> ## Documentation Index
> Fetch the complete documentation index at: https://docs.stackone.com/llms.txt
> Use this file to discover all available pages before exploring further.

# Connect RT (Request Tracker) with API Token – StackOne Hub

> Link a RT (Request Tracker) account in the StackOne Hub using API Token. End-user guide to authorize the integration and start using RT (Request Tracker) actions.

<Warning>The authentication token is shown only once, right after you create it. Copy it immediately and store it somewhere safe — RT will not let you view it again. If you lose it, create a new token. Auth tokens require RT 5.0 or newer.</Warning>

<section data-guide-section data-guide-scopes="">
  <h2>Connect Request Tracker with an authentication token</h2>

  <p>StackOne connects to your self-hosted Request Tracker (RT) instance using two values: your <strong>Instance URL</strong> and an <strong>authentication token</strong> created inside RT. You will sign in to RT, create the token under your account settings, and paste both values into StackOne Hub.</p>

  <Steps>
    <Step title="Sign in to Request Tracker">
      <div data-guide-step data-guide-scopes="" data-guide-display-scopes-list="">
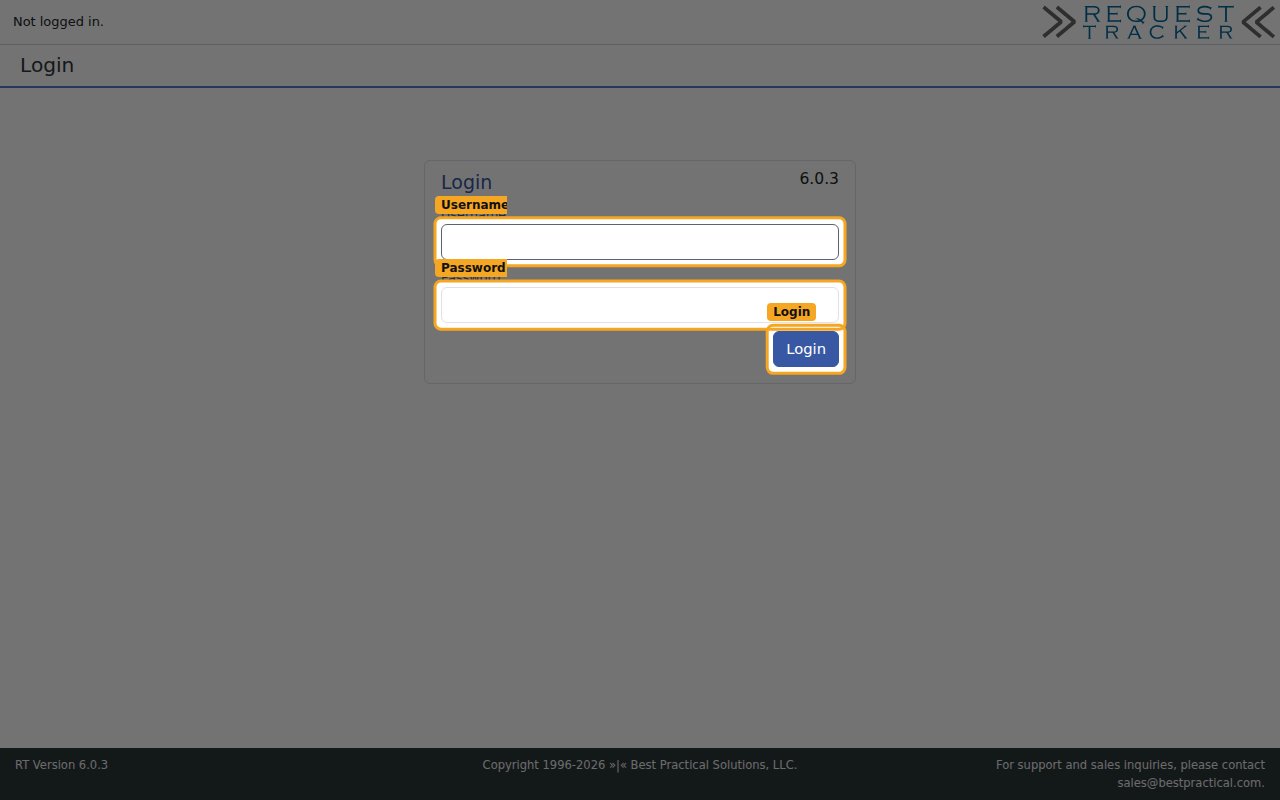
        <p>Open your organization's RT instance in a browser and sign in with your RT username and password on the <strong>Login</strong> screen. Your account needs permission to see and act on the tickets, queues, and users you want StackOne to access — the token inherits your own permissions.</p>

        <ul>
          <li>Your <strong>Instance URL</strong> is the base address of your RT instance shown in the browser address bar, without a trailing slash.</li>
          <li>Format: `https://{your-rt-host}`</li>
          <li>Example: `https://rt.example.com`</li>
          <li>Paste this value into the <strong>Instance URL</strong> field in StackOne Hub.</li>
        </ul>

        <img src="https://mintcdn.com/stackone-60/DB5fqdvDSg8KcJBC/connectors/requesttracker/images/custom-config-sign-in.png?fit=max&auto=format&n=DB5fqdvDSg8KcJBC&q=85&s=504089ede153b6b494247c4bc4956093" alt="The Request Tracker Login screen with the Username, Password, and Login fields highlighted" width="1280" height="800" data-path="connectors/requesttracker/images/custom-config-sign-in.png" />
      </div>
    </Step>

    <Step title="Open your authentication tokens">
      <div data-guide-step data-guide-scopes="" data-guide-display-scopes-list="">
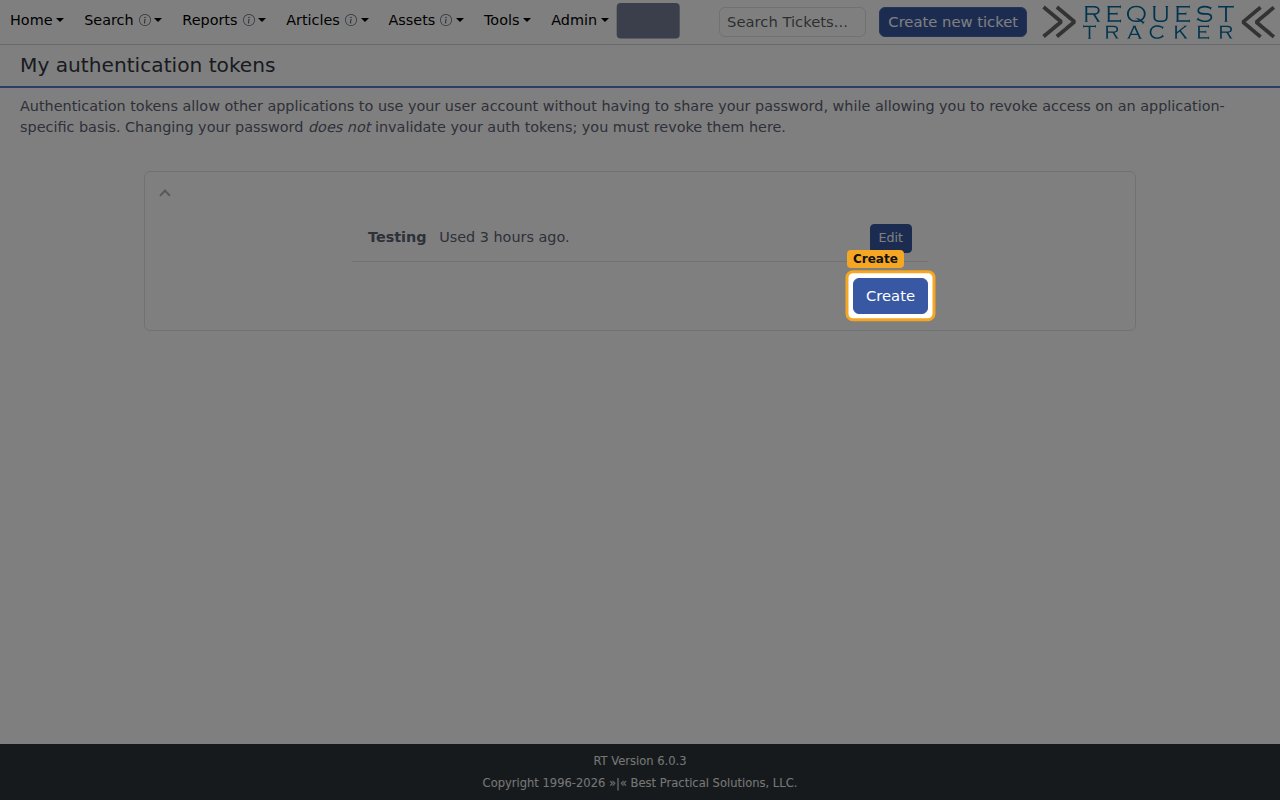
        <p>In the top-right corner, open the menu showing your name, then go to <strong>Settings → Auth Tokens</strong>. This opens the <strong>My authentication tokens</strong> page, which lists your existing tokens. Click <strong>Create</strong> to add a new one.</p>

        <img src="https://mintcdn.com/stackone-60/DB5fqdvDSg8KcJBC/connectors/requesttracker/images/custom-config-auth-tokens.png?fit=max&auto=format&n=DB5fqdvDSg8KcJBC&q=85&s=566eab479fa3b4e59f346e81e4ceddac" alt="The My authentication tokens page with the Create button highlighted" width="1280" height="800" data-path="connectors/requesttracker/images/custom-config-auth-tokens.png" />
      </div>
    </Step>

    <Step title="Create the authentication token">
      <div data-guide-step data-guide-scopes="" data-guide-display-scopes-list="">
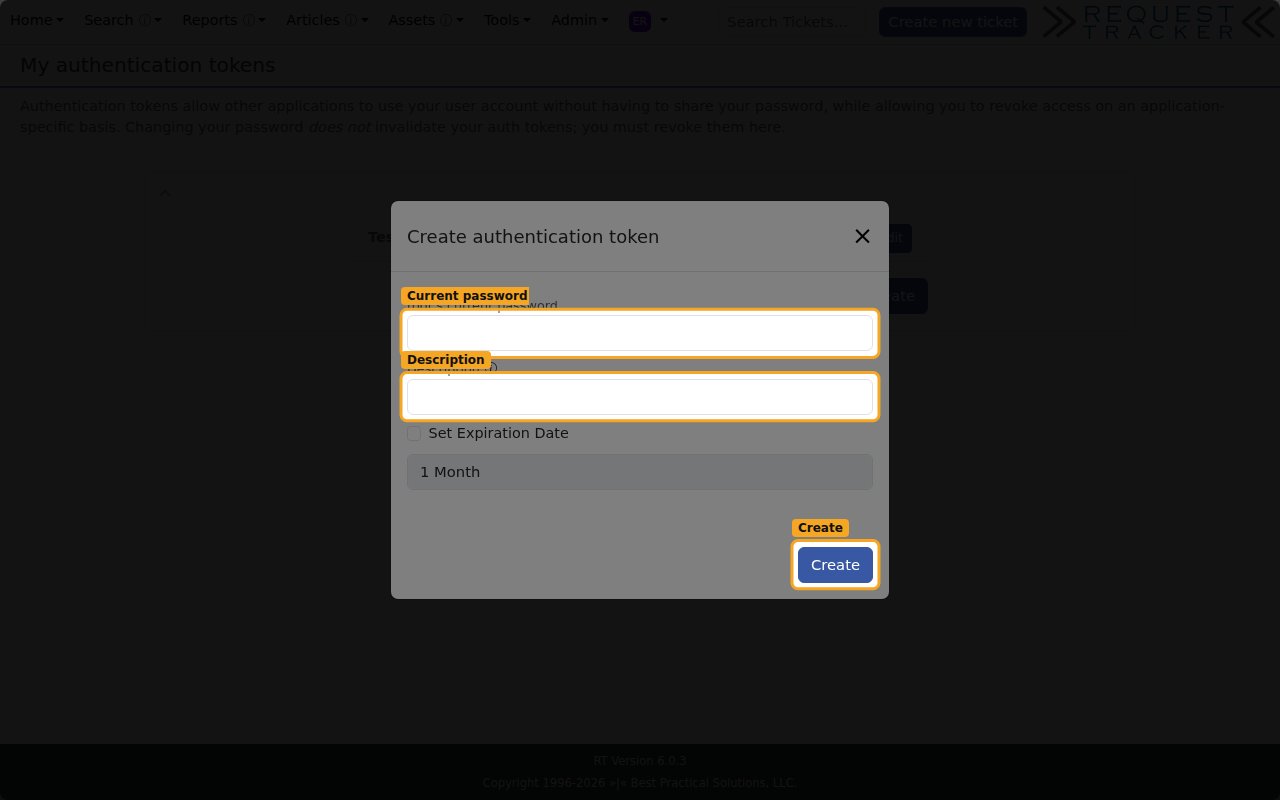
        <p>In the <strong>Create authentication token</strong> dialog, enter your account password in the current-password field, then type a <strong>Description</strong> so you can recognize the token later (for example, StackOne). Optionally tick <strong>Set Expiration Date</strong> to choose an expiry; leave it unchecked for a non-expiring token. Click <strong>Create</strong>.</p>

        <img src="https://mintcdn.com/stackone-60/DB5fqdvDSg8KcJBC/connectors/requesttracker/images/custom-config-create-token.png?fit=max&auto=format&n=DB5fqdvDSg8KcJBC&q=85&s=ed4e3a55f48876f7fd2800393e341a23" alt="The Create authentication token dialog showing the current password field, Description field, Set Expiration Date option, and Create button" width="1280" height="800" data-path="connectors/requesttracker/images/custom-config-create-token.png" />
      </div>
    </Step>

    <Step title="Copy the token into StackOne Hub">
      <div data-guide-step data-guide-scopes="" data-guide-display-scopes-list="">
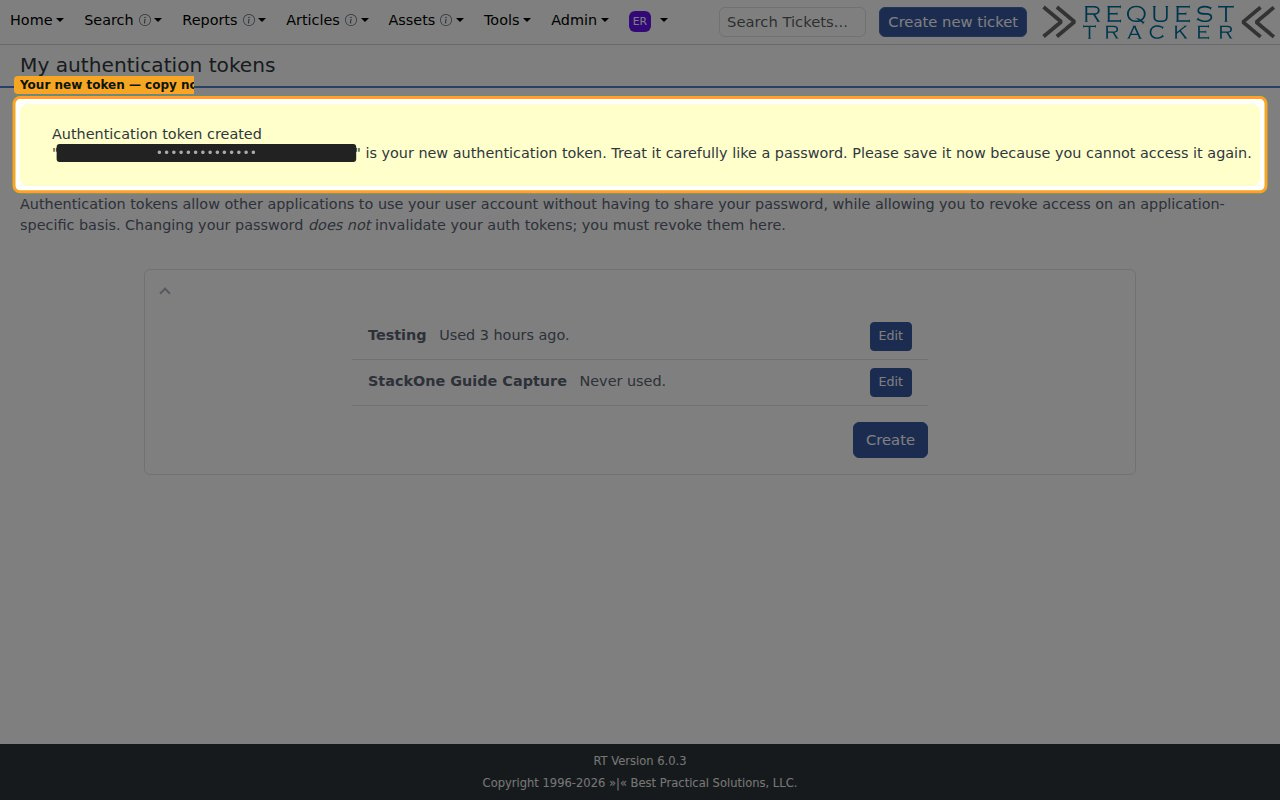
        <p>RT shows the message <strong>Authentication token created</strong> with your new token value. Copy the token immediately — this is the only time it is displayed.</p>

        <ul>
          <li>The token is shown only once and cannot be retrieved later — copy it before leaving the page.</li>
          <li>This is your <strong>API Token</strong> — paste it into the <strong>API Token</strong> field in StackOne Hub.</li>
          <li>RT states you must save it now because you cannot access it again; if you lose it, create a new token.</li>
        </ul>

        <img src="https://mintcdn.com/stackone-60/DB5fqdvDSg8KcJBC/connectors/requesttracker/images/custom-config-copy-token.png?fit=max&auto=format&n=DB5fqdvDSg8KcJBC&q=85&s=65aa74fddf64a3166aeb614ab5796407" alt="The Authentication token created message with the new token value redacted" width="1280" height="800" data-path="connectors/requesttracker/images/custom-config-copy-token.png" />
      </div>
    </Step>
  </Steps>
</section>

<div data-whitelabel-hide>
  <h2>Linking the Account from the Hub</h2>

  <Steps>
    <Step title="Navigate to the Hub">
      Use one of the three <a href="/connect/managing-connectors/linking-accounts">Linking Account Methods</a> to access the Hub.
    </Step>

    <Step title="Fill out the fields">
      Fill out the following fields using details from your provider:

      <ul>
        <li><strong>Instance URL</strong></li>
        <li><strong>API Token</strong></li>
      </ul>
    </Step>

    <Step title="Connect">
      <ul>
        <li>Click <strong>Connect</strong></li>
        <li>If applicable, the provider will redirect you to a sign-in or authorization page. Complete the provider's authorization flow.</li>
        <li>Once authorization is successful, you will see a confirmation popup</li>
      </ul>
    </Step>
  </Steps>

  <p>If the account linking is successful, you will see the newly linked account in your <a href="/gateway/concepts/linked-accounts">Accounts</a> page.</p>
</div>