> ## Documentation Index
> Fetch the complete documentation index at: https://docs.stackone.com/llms.txt
> Use this file to discover all available pages before exploring further.

# Connect PubMed with API Key – StackOne Hub

> Link a PubMed account in the StackOne Hub using API Key. End-user guide to authorize the integration and start using PubMed actions.

<section data-guide-section data-guide-scopes="">
  <h2>Create your NCBI API key</h2>

  <p>The NCBI E-utilities API that powers this connector works without any credentials at a rate of <strong>3 requests/second</strong> per IP address. Adding an NCBI API key is optional and raises that limit to <strong>10 requests/second</strong>. Follow the steps below to generate a key from your NCBI account and add it in StackOne Hub.</p>

  <Steps>
    <Step title="Sign in to your NCBI account">
      <div data-guide-step data-guide-scopes="" data-guide-display-scopes-list="">
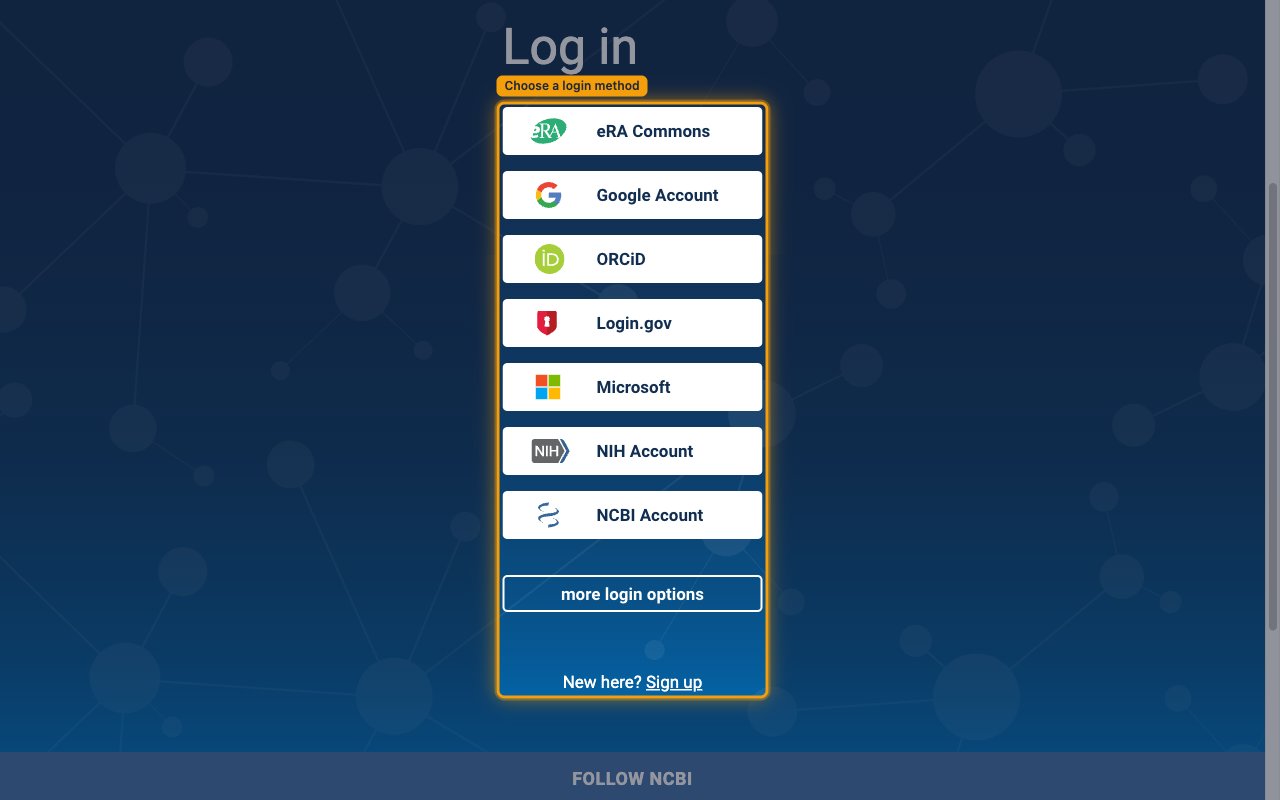
        <p>Open the <a href="https://account.ncbi.nlm.nih.gov/" target="_blank" rel="noopener noreferrer">NCBI account login page</a> and sign in. NCBI does not use a password of its own — pick one of the third-party login methods on the <strong>Log in</strong> screen:</p>

        <ul>
          <li><strong>eRA Commons</strong></li>
          <li><strong>Google Account</strong></li>
          <li><strong>ORCiD</strong></li>
          <li><strong>Login.gov</strong></li>
          <li><strong>Microsoft</strong></li>
          <li><strong>NIH Account</strong></li>
          <li><strong>NCBI Account</strong></li>
          <li>If you do not yet have an NCBI account, use <strong>more login options</strong> or <strong>Sign up</strong> to create one first.</li>
        </ul>

        <img src="https://mintcdn.com/stackone-60/dF1Ul392l6rlD_Mh/connectors/pubmed/images/apikey-config-sign-in.png?fit=max&auto=format&n=dF1Ul392l6rlD_Mh&q=85&s=3782a8e93eecc3b6c4b4ded82441b2b0" alt="NCBI Log in screen showing the available third-party login methods" width="1280" height="800" data-path="connectors/pubmed/images/apikey-config-sign-in.png" />
      </div>
    </Step>

    <Step title="Open Account Settings">
      <div data-guide-step data-guide-scopes="" data-guide-display-scopes-list="">
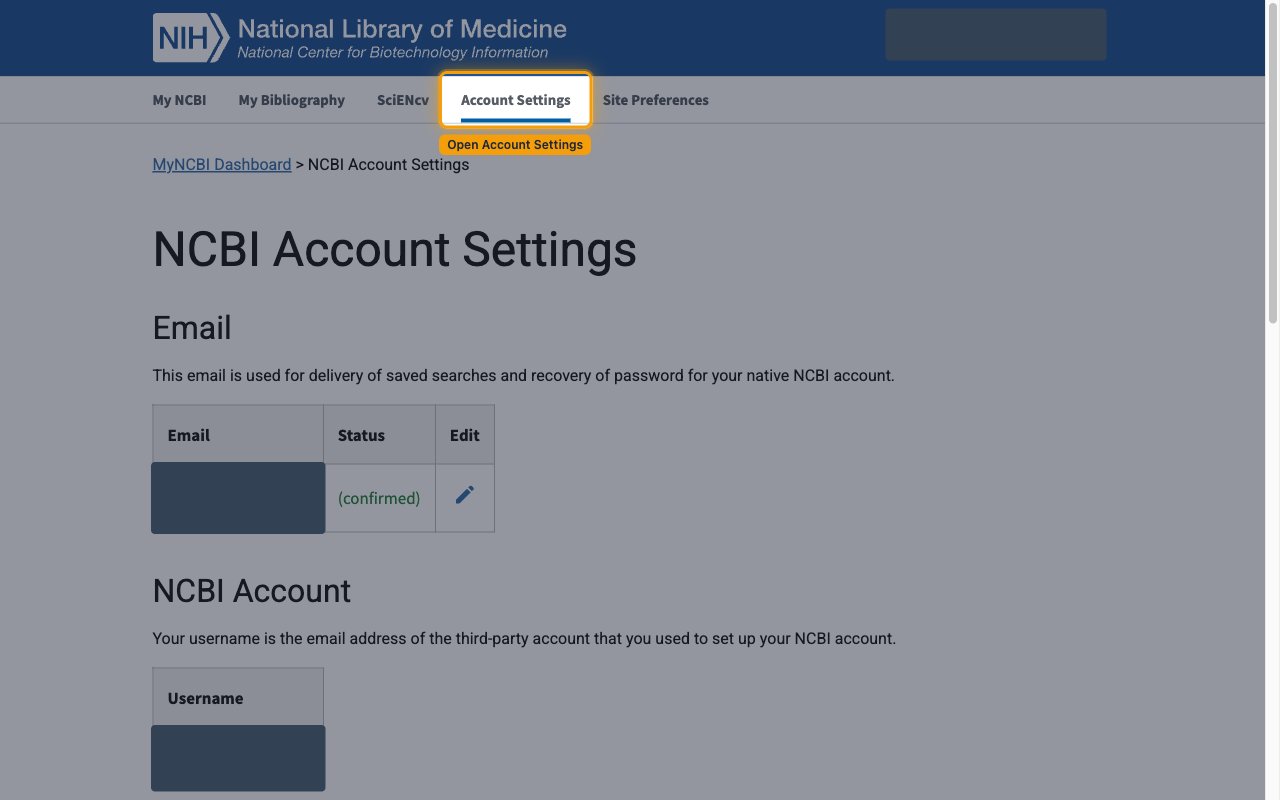
        <p>Once signed in, click <strong>Account Settings</strong> in the top navigation bar (you can also open it directly at the <a href="https://account.ncbi.nlm.nih.gov/settings/" target="_blank" rel="noopener noreferrer">NCBI Account Settings page</a>). The <strong>NCBI Account Settings</strong> page opens.</p>

        <img src="https://mintcdn.com/stackone-60/dF1Ul392l6rlD_Mh/connectors/pubmed/images/apikey-config-account-settings.png?fit=max&auto=format&n=dF1Ul392l6rlD_Mh&q=85&s=5fb5878dd209711d02c7546a03f088d4" alt="NCBI Account Settings page with the Account Settings navigation item highlighted" width="1280" height="800" data-path="connectors/pubmed/images/apikey-config-account-settings.png" />
      </div>
    </Step>

    <Step title="Create your API key">
      <div data-guide-step data-guide-scopes="" data-guide-display-scopes-list="">
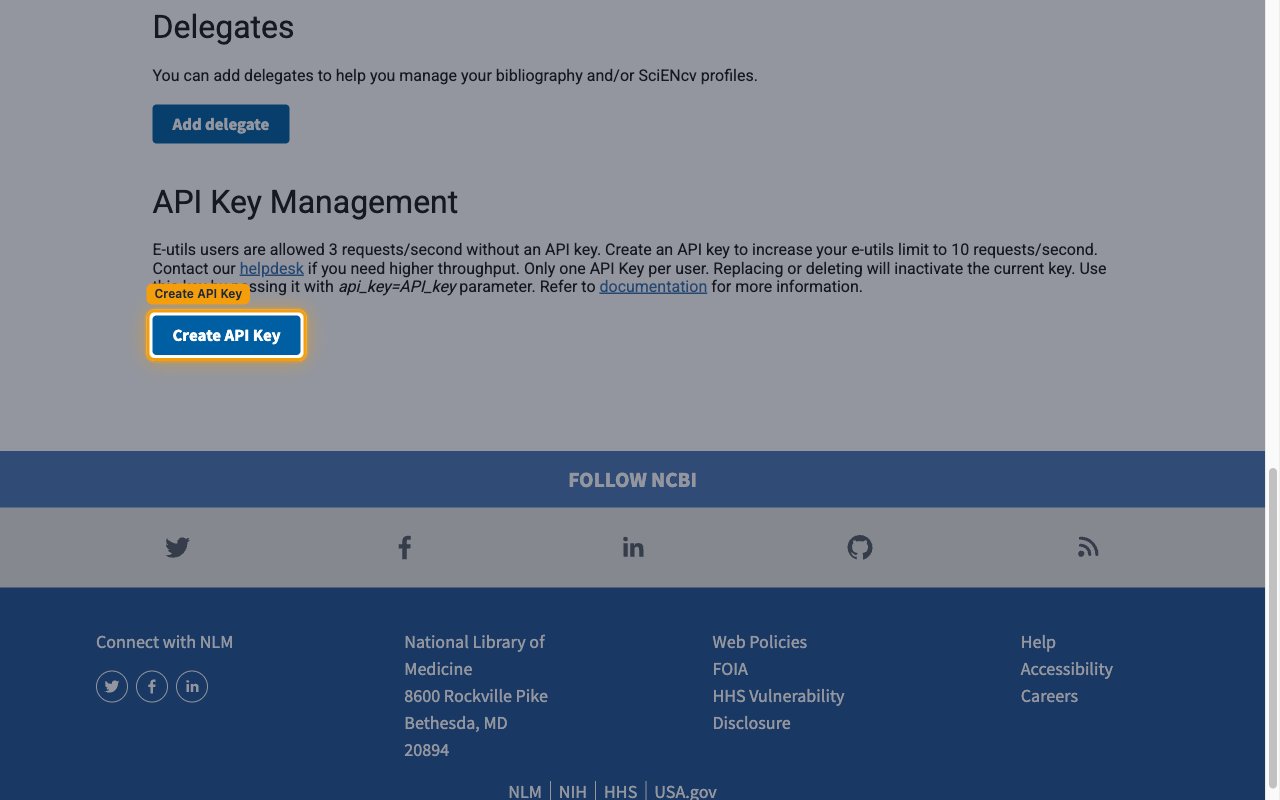
        <p>Scroll down to the <strong>API Key Management</strong> section and click <strong>Create API Key</strong>. NCBI generates a single key for your account.</p>

        <ul>
          <li>The section confirms: *E-utils users are allowed 3 requests/second without an API key. Create an API key to increase your e-utils limit to 10 requests/second.*</li>
          <li><strong>Only one API Key per user.</strong> Replacing or deleting will inactivate the current key.</li>
          <li>The key is used by passing it as the `api_key=API_key` request parameter — StackOne does this for you automatically.</li>
        </ul>

        <img src="https://mintcdn.com/stackone-60/dF1Ul392l6rlD_Mh/connectors/pubmed/images/apikey-config-create-api-key.png?fit=max&auto=format&n=dF1Ul392l6rlD_Mh&q=85&s=1d98fa120f576b55a45c2dbdcce17780" alt="API Key Management section of NCBI Account Settings with the Create API Key button highlighted" width="1280" height="800" data-path="connectors/pubmed/images/apikey-config-create-api-key.png" />
      </div>
    </Step>

    <Step title="Copy your API key into StackOne Hub">
      <div data-guide-step data-guide-scopes="" data-guide-display-scopes-list="">
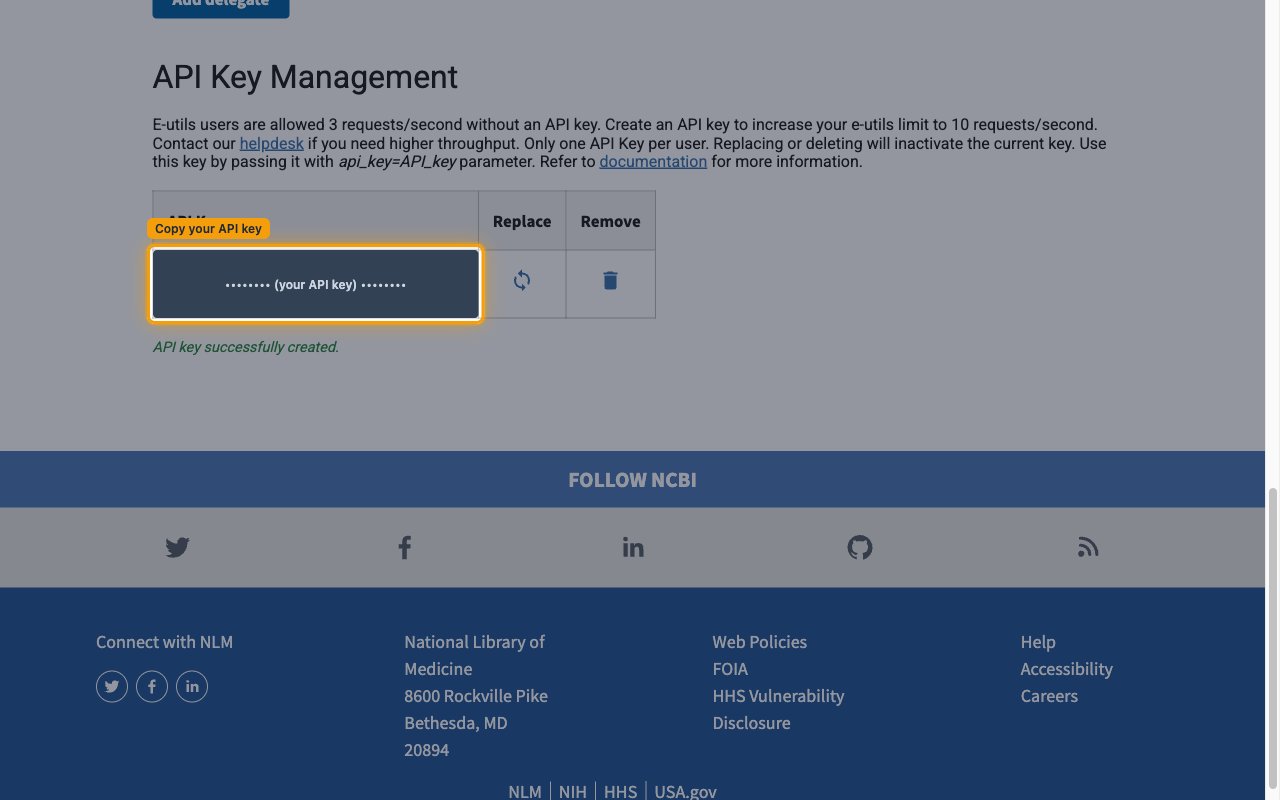
        <p>After you click <strong>Create API Key</strong>, the message <strong>API key successfully created.</strong> appears and your key is shown in the <strong>API Key</strong> row. Copy that value and paste it into the <strong>API Key</strong> field in StackOne Hub.</p>

        <ul>
          <li><strong>API Key</strong> — the NCBI key you just generated. Copy the value shown in the <strong>API Key</strong> row and paste it into the <strong>API Key</strong> field in StackOne Hub. It is required for this connection.</li>
          <li><strong>Contact Email</strong> — optional. Enter the maintainer email address NCBI should use to contact you before throttling heavy usage, in the <strong>Contact Email</strong> field in StackOne Hub.</li>
          <li>Your key stays available in <strong>API Key Management</strong> — return here any time to copy it again, use <strong>Replace API key</strong> to rotate it, or <strong>Remove API key</strong> to delete it.</li>
        </ul>

        <img src="https://mintcdn.com/stackone-60/dF1Ul392l6rlD_Mh/connectors/pubmed/images/apikey-config-copy-api-key.png?fit=max&auto=format&n=dF1Ul392l6rlD_Mh&q=85&s=4a4983875ec72fea3a04041d8f556b12" alt="API Key Management section after key creation, with the generated key redacted and the Copy your API key location highlighted" width="1280" height="800" data-path="connectors/pubmed/images/apikey-config-copy-api-key.png" />
      </div>
    </Step>
  </Steps>
</section>

<div data-whitelabel-hide>
  <h2>Linking the Account from the Hub</h2>

  <Steps>
    <Step title="Navigate to the Hub">
      Use one of the three <a href="/guides/accounts-section#linking-accounts">Linking Account Methods</a> to access the Hub.
    </Step>

    <Step title="Fill out the fields">
      Fill out the following fields using details from your provider:

      <ul>
        <li><strong>API Key</strong></li>
        <li><strong>Contact Email</strong> (Optional)</li>
      </ul>
    </Step>

    <Step title="Connect">
      <ul>
        <li>Click <strong>Connect</strong></li>
        <li>If applicable, the provider will redirect you to a sign-in or authorization page. Complete the provider's authorization flow.</li>
        <li>Once authorization is successful, you will see a confirmation popup</li>
      </ul>
    </Step>
  </Steps>

  <p>If the account linking is successful, you will see the newly linked account in your <a href="/guides/accounts-section">Accounts</a> page.</p>
</div>