> ## Documentation Index
> Fetch the complete documentation index at: https://docs.stackone.com/llms.txt
> Use this file to discover all available pages before exploring further.
# PingOne OAuth 2.0 connector profile – StackOne setup guide
> Set up the OAuth 2.0 connector profile for PingOne in StackOne. One-time admin setup required before your users can link PingOne accounts via Hub.
PingOne authorises Management API calls based on the admin roles assigned to the signing-in user, not on OAuth scopes. If the user who signs in during the StackOne connection does not hold a suitable role (Environment Admin, Identity Data Admin, or Organization Admin), the API returns HTTP 403 even when the application is configured correctly.
Create a Worker Application
Register a new Worker application in the PingOne Admin Console. Worker is the only application type that can call the PingOne Management API on StackOne's behalf.
With the Admin Console open, confirm the environment shown in the breadcrumb at the top of the page is the one you want to connect.
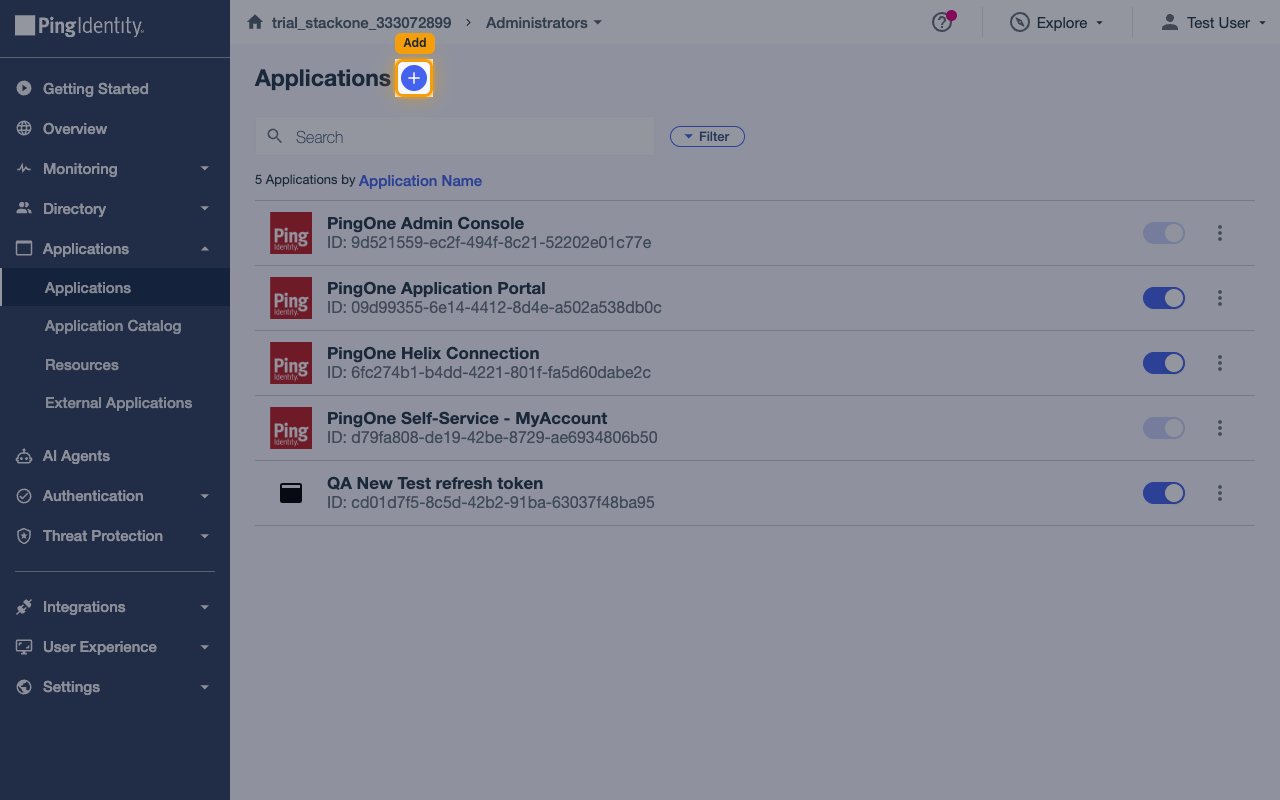
- In the left navigation, expand Applications and click Applications.
- Click the Add (+) button in the top-right corner of the Applications page.
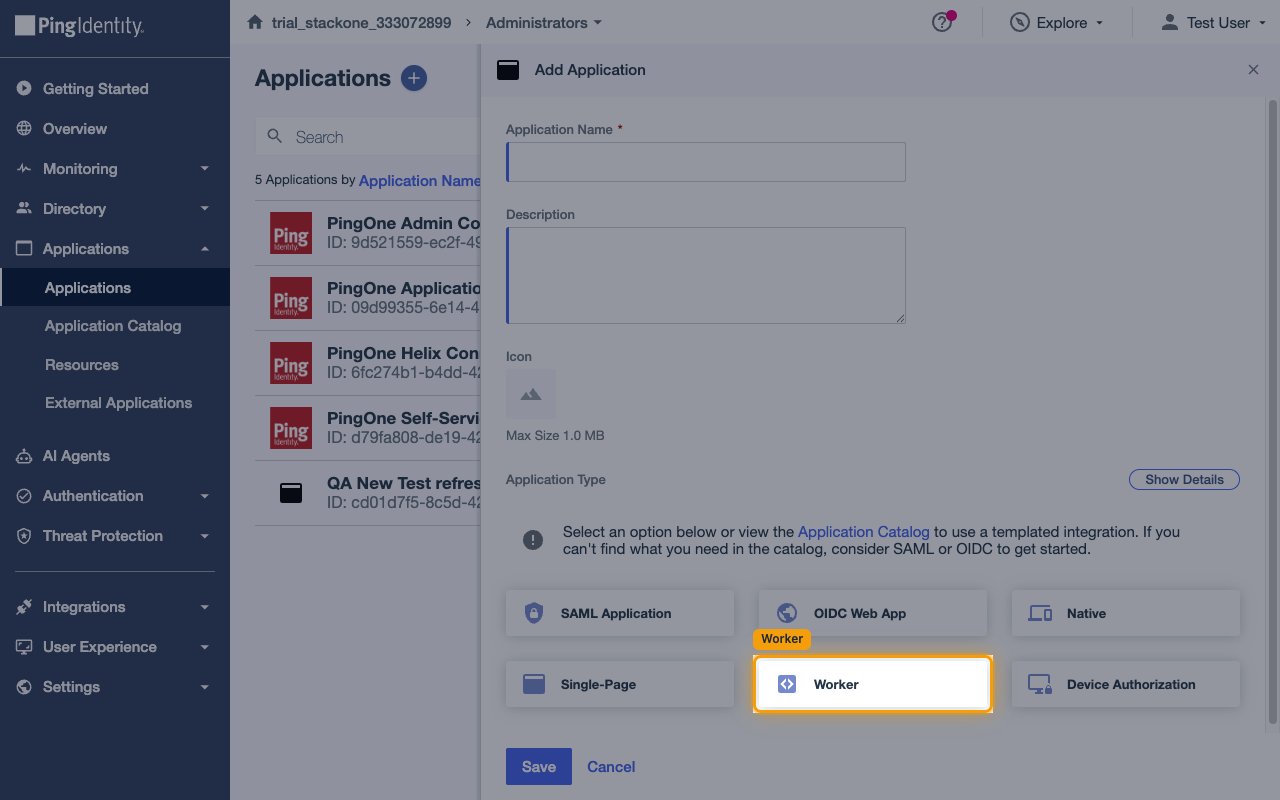
In the Add Application panel:
- Application Name (required) — enter a descriptive name, for example `StackOne Integration`.
- Description (optional) — add a short note, such as `StackOne delegated admin integration`.
- Icon (optional) — upload an image up to the size shown (1 MB).
- Under Application Type, select the Worker tile.
- Click Save.
At the top of the application panel, next to the application name, switch the enablement toggle on. It turns blue when the application is enabled. A newly created Worker application is disabled by default, and a disabled application fails during the OAuth flow.
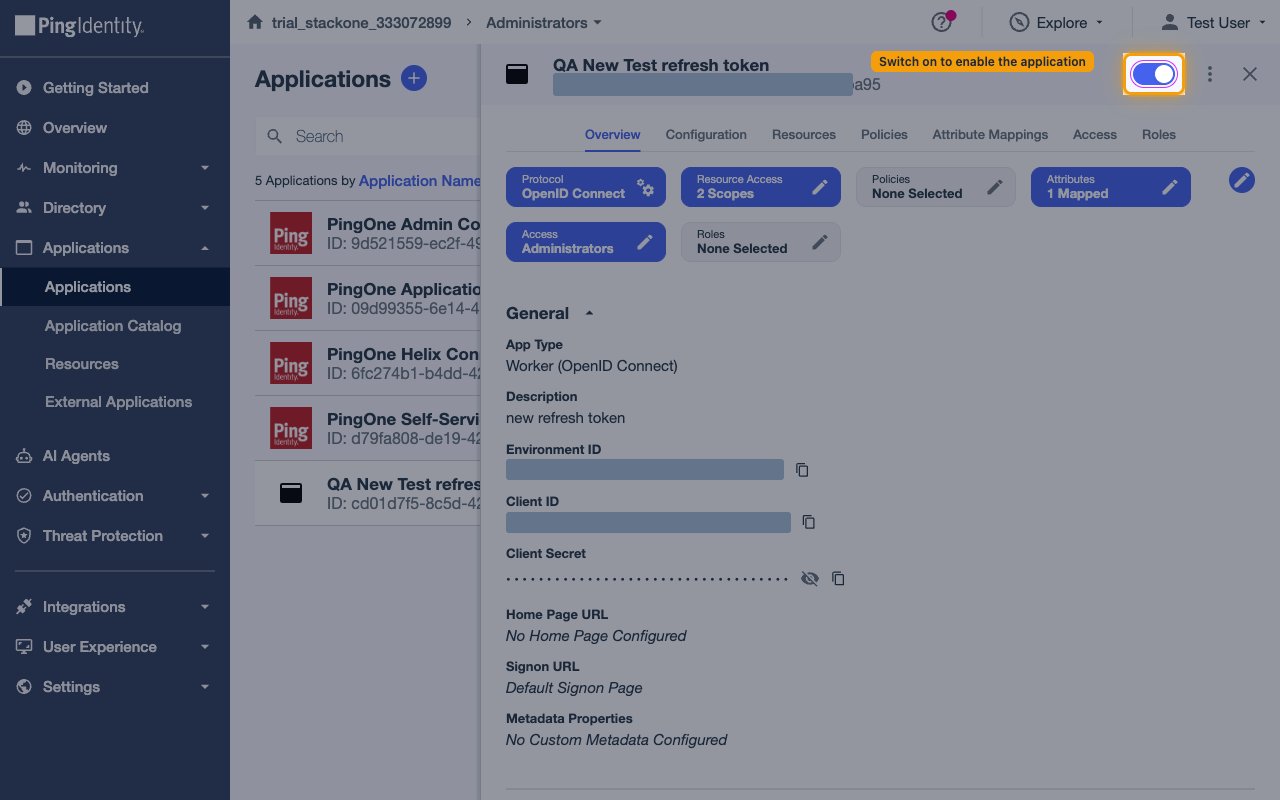
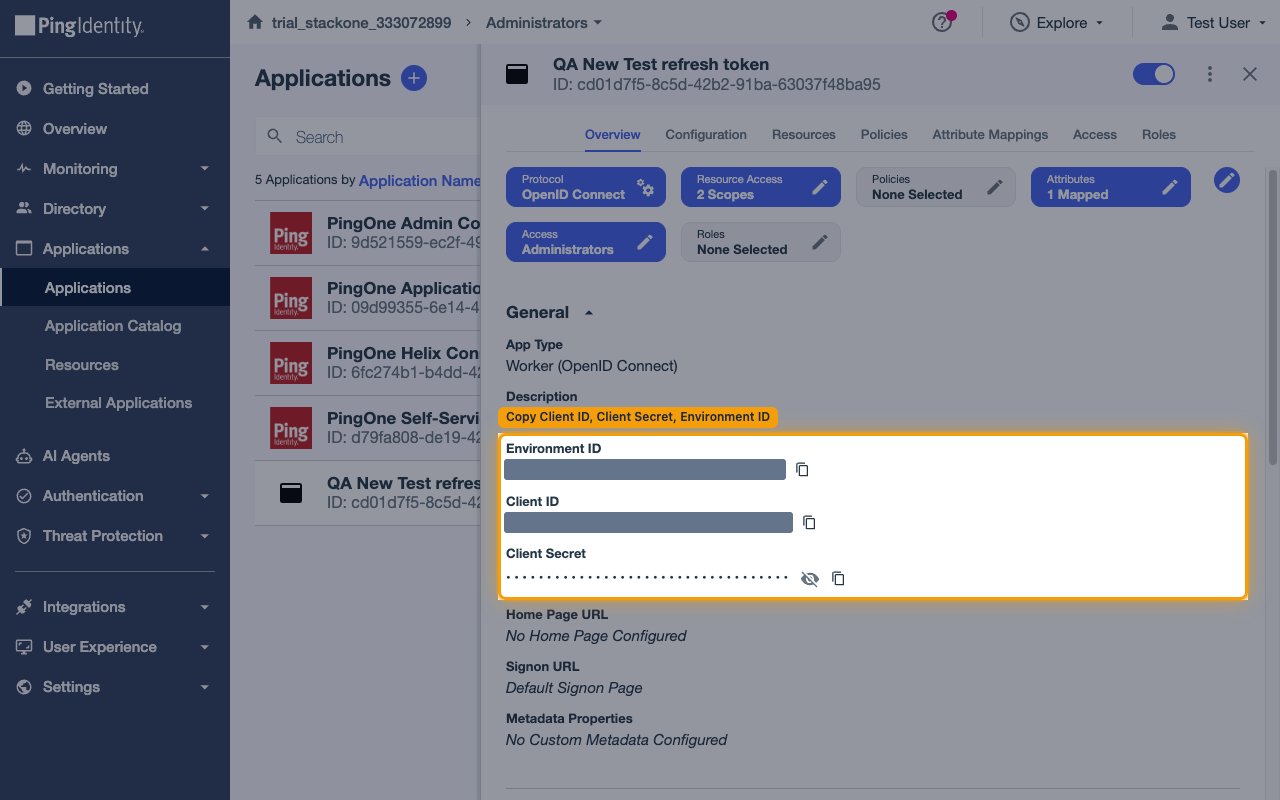
Open the Overview tab. Under General (App Type Worker (OpenID Connect)) you will find the three values StackOne needs:
- Copy the Environment ID and paste it into the Environment ID field in StackOne.
- Copy the Client ID and paste it into the Client ID field in StackOne.
- For the Client Secret, click the eye icon to reveal the value, then the copy icon, and paste it into the Client Secret field in StackOne. Store the secret securely. You can reveal it again later from this screen, or rotate it with Generate New Secret.
Configure OIDC Settings
Open the Configuration tab and click the pencil (edit) icon in the top-right to edit the OIDC Settings.
Under OIDC Settings:
- Response Type — check Code. Leave Token and ID Token unchecked.
- Grant Type — check both Authorization Code and Refresh Token. The Refresh Token grant lets the connector renew access tokens automatically.
- PKCE Enforcement — leave as OPTIONAL.
- Leave Implicit, Client Credentials, Device Authorization, and CIBA unchecked.
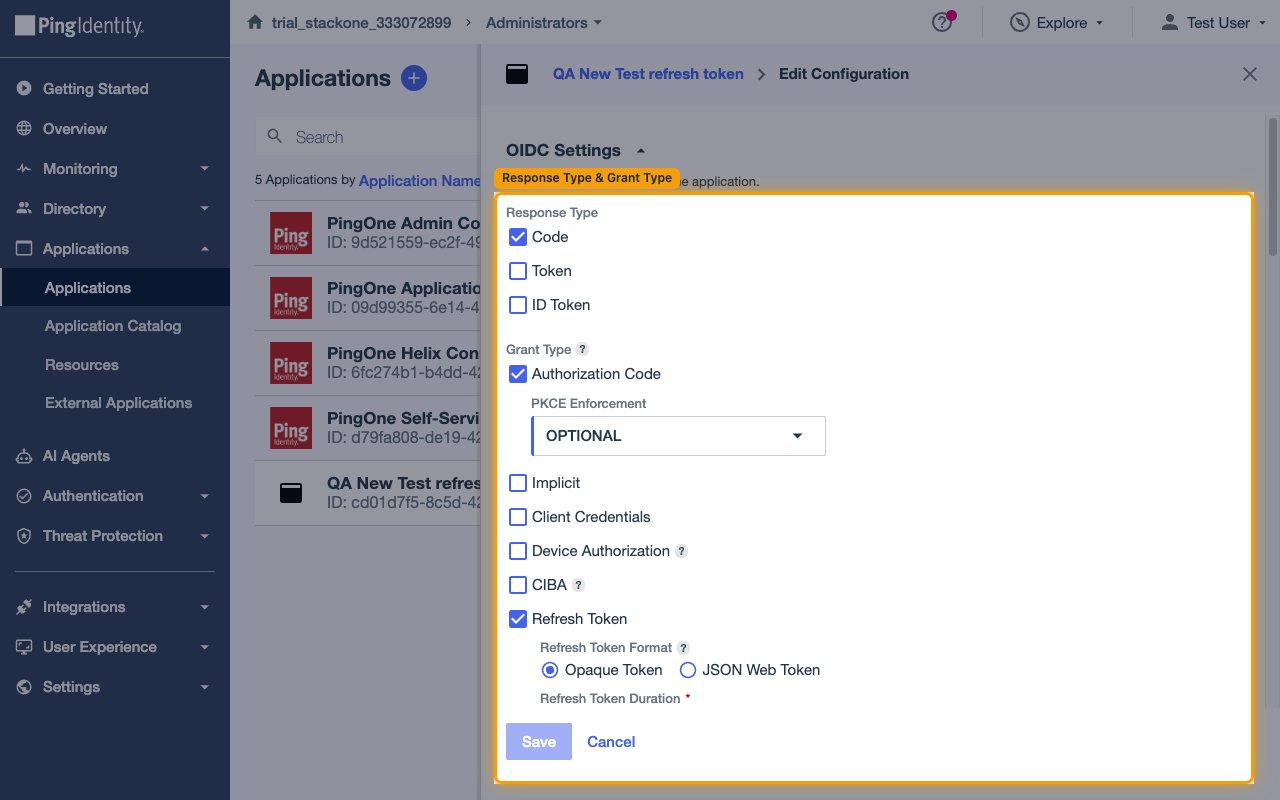
The refresh token options appear once the Refresh Token grant is enabled:
- Refresh Token Format — select JSON Web Token (recommended).
- Refresh Token Duration — for example `30` Days.
- Refresh Token Rolling Duration — for example `180` Days.
- Refresh Token Rolling Grace Period — leave at the default unless you need a longer overlap window.
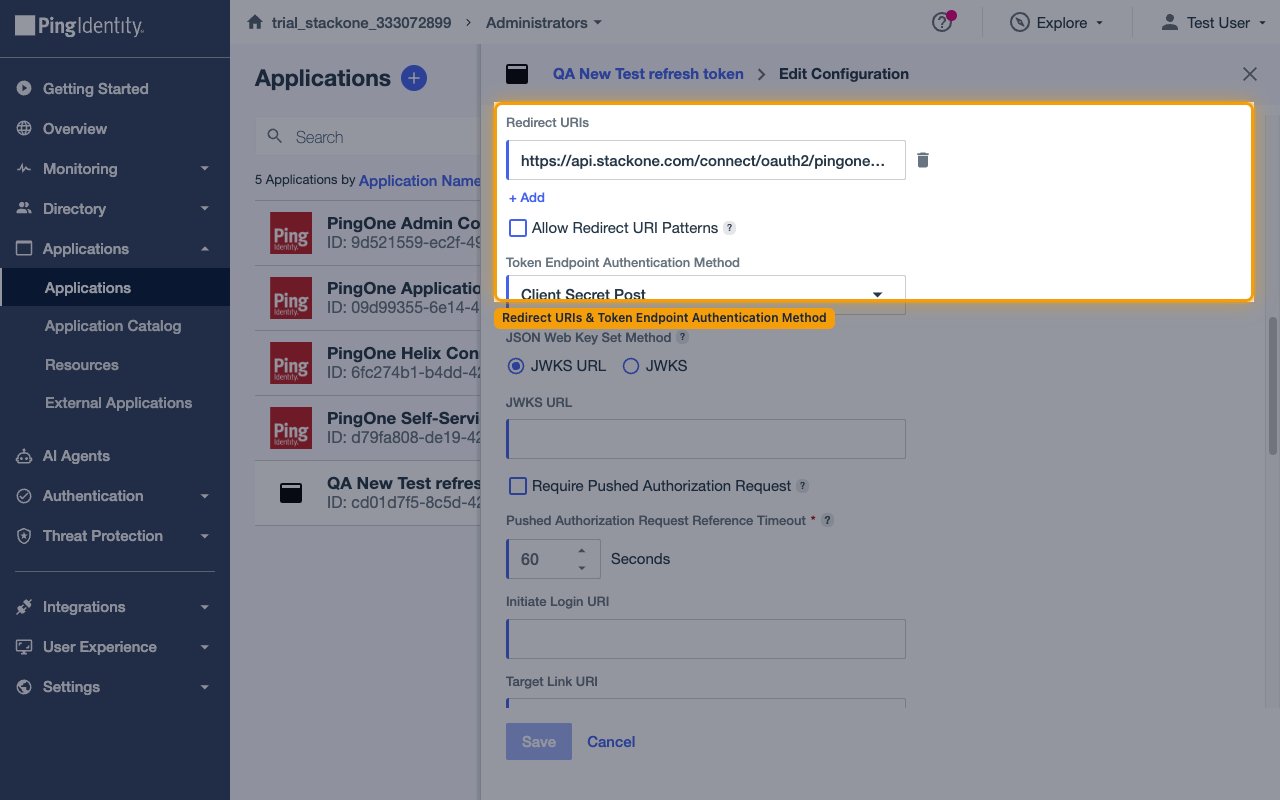
Still in the OIDC Settings edit panel:
- Under Redirect URIs, click + Add and enter the exact StackOne callback URL with no trailing slash: `https://api.stackone.com/connect/oauth2/pingone/callback`.
- Leave Allow Redirect URI Patterns unchecked unless you specifically need wildcard matching.
- Token Endpoint Authentication Method — select Client Secret Post. StackOne sends the client credentials in the request body.
- Click Save.
Restrict Application Access
The Access and Resources tabs control who can sign in and which OIDC scopes the application requests.
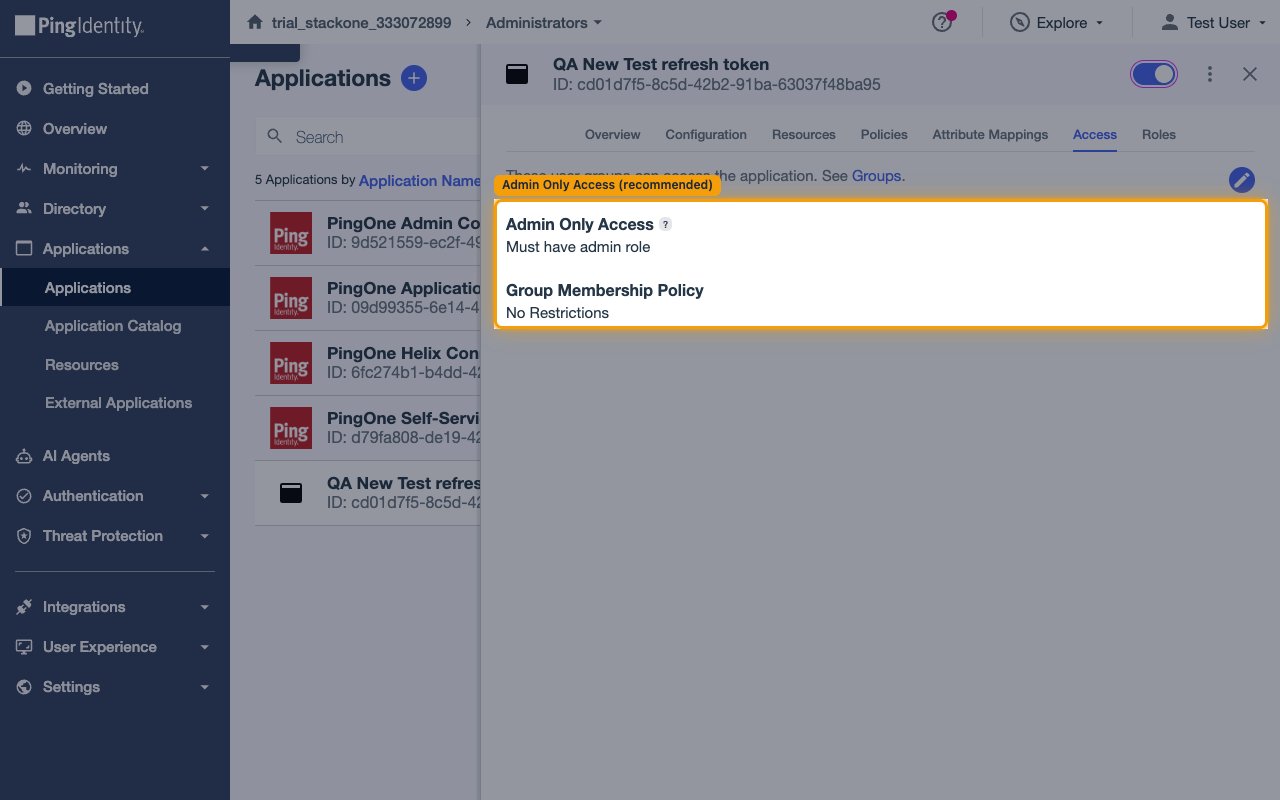
Open the Access tab and click the pencil (edit) icon:
- Enable Admin Only Access so only PingOne admin users can sign in (Must have admin role). This is recommended for Management API integrations.
- Leave Group Membership Policy as No Restrictions unless you want to limit sign-in to a specific group.
Open the Resources tab. The connector requests only the standard OIDC scopes `openid` and `offline_access`, which are available by default — no changes are needed here.
Assign an Admin Role to the Signing-In User
This is the step most often missed. With the Authorization Code grant, PingOne authorises Management API calls based on the signing-in user's roles, not the application's roles. Without a suitable role on that user, every API call returns HTTP 403.
Identify the PingOne user who will sign in during the StackOne connection flow:
- In the left navigation, go to Directory and click Users.
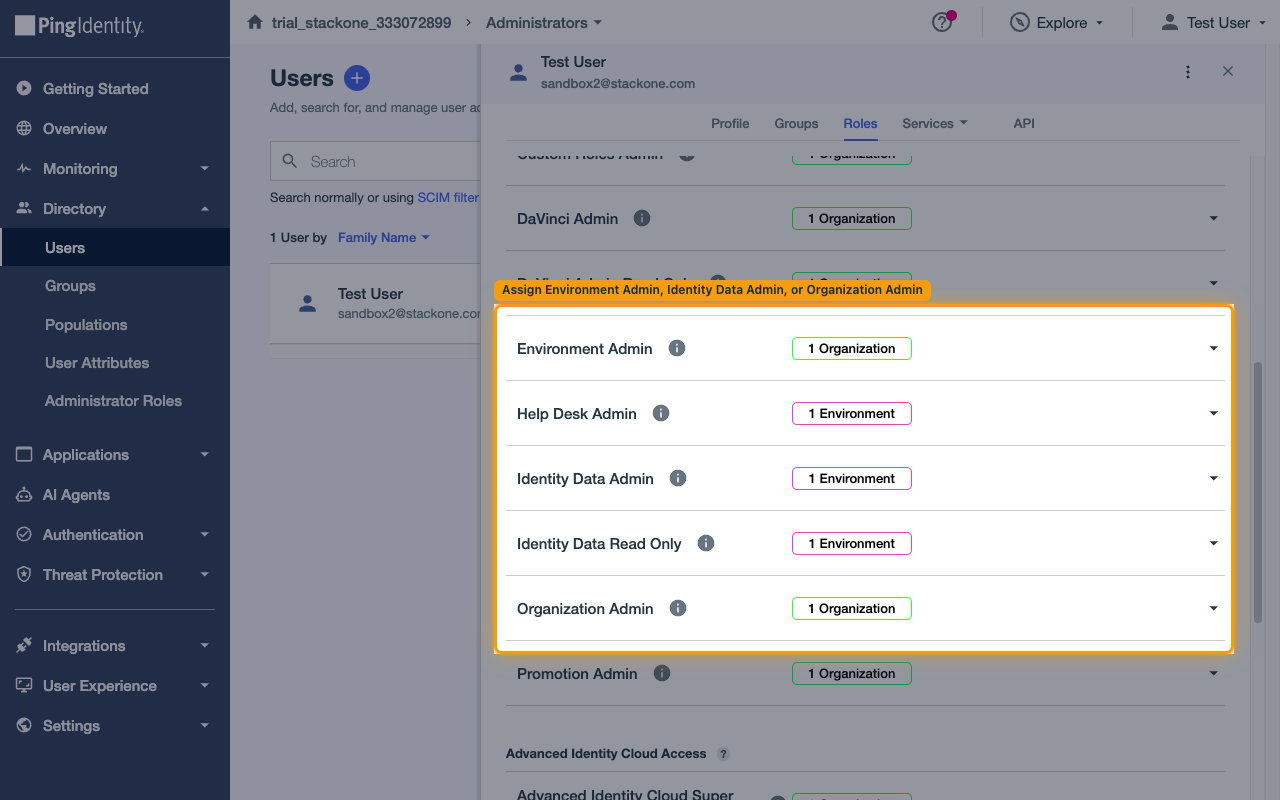
- Select the account you plan to use, then open the Roles tab on the user panel.
On the Roles tab, locate the role you want and assign it at the appropriate scope:
- For full Management API coverage — assign Organization Admin at the organization scope, or Environment Admin at the environment scope. Either covers all actions.
- For identity-only access — assign Identity Data Admin at the environment scope. This covers users, groups, populations, applications, and MFA devices, but not sign-on policies, password policies, identity providers, or certificates.
## Creating the StackOne Connector Profile
To create the Connector Profile in StackOne for PingOne:
Login to StackOne and navigate to [Connector Profiles](https://app.stackone.com/connector_profiles)
- Click + Connector Profile
- Search for and select PingOne
- Select Type as OAuth 2.0
-
Fill out the fields using details retrieved from your provider:
- Client ID
- Client Secret
- Environment ID
- (Optional) Select Actions to be enabled for this Connector Profile
- Click Create profile
Congratulations! The new Connector Profile will now show up in your project ready to be used. You can now continue to Link Accounts for PingOne.