> ## Documentation Index
> Fetch the complete documentation index at: https://docs.stackone.com/llms.txt
> Use this file to discover all available pages before exploring further.

# Connect Hugging Face with User Access Token – StackOne Hub

> Link a Hugging Face account in the StackOne Hub using User Access Token. End-user guide to authorize the integration and start using Hugging Face actions.

<section data-guide-section data-guide-scopes="">
  <h2>Create a User Access Token</h2>

  <p>Hugging Face authenticates API calls with a User Access Token generated from your account settings.</p>

  <Steps>
    <Step title="Sign in to Hugging Face">
      <div data-guide-step data-guide-scopes="" data-guide-display-scopes-list="">
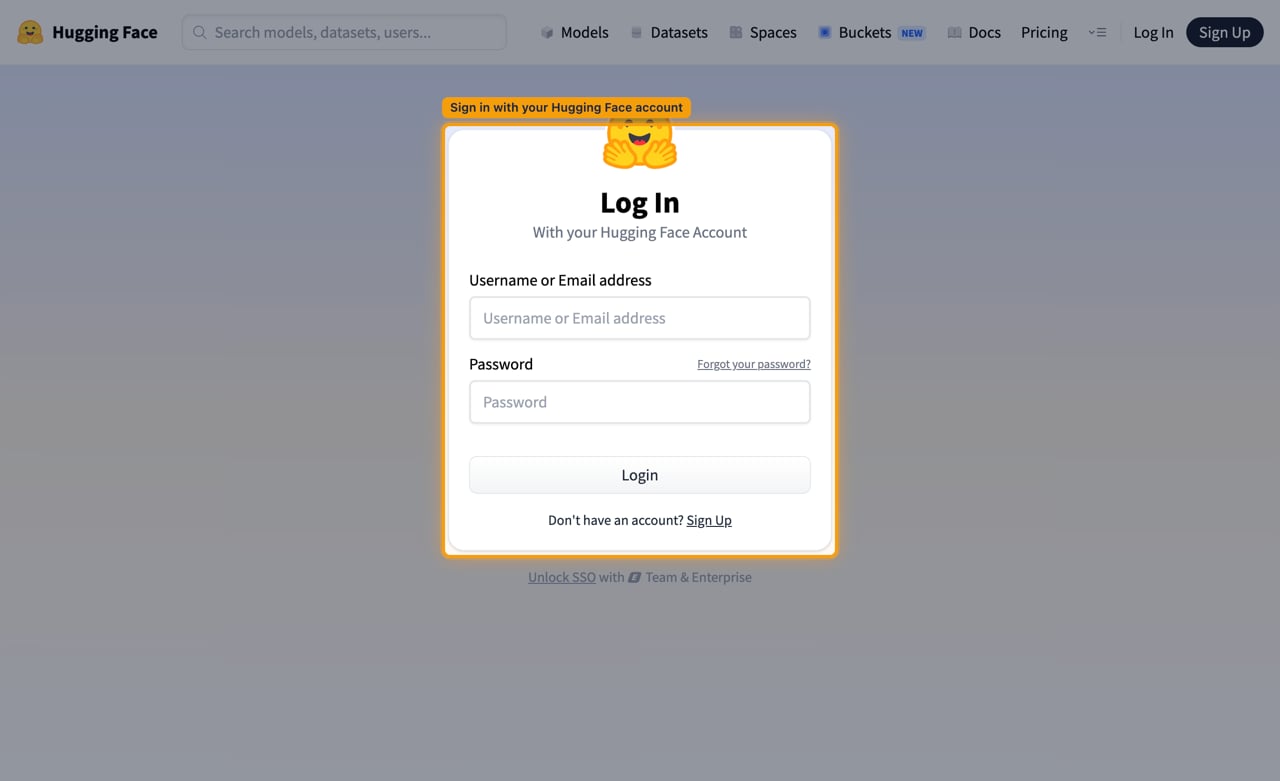
        <p>Sign in on the <a href="https://huggingface.co/login" target="_blank" rel="noopener noreferrer">Hugging Face log-in page</a> with your <strong>Username or Email address</strong> and <strong>Password</strong>, then click <strong>Login</strong>.</p>

        <img src="https://mintcdn.com/stackone-60/RT3ZGjUOVjGkKvM9/connectors/huggingface/images/custom-config-sign-in.png?fit=max&auto=format&n=RT3ZGjUOVjGkKvM9&q=85&s=8684586ae24043c3333493bcb89f4011" alt="Hugging Face log in page with the sign-in card highlighted" width="1280" height="781" data-path="connectors/huggingface/images/custom-config-sign-in.png" />
      </div>
    </Step>

    <Step title="Open Access Tokens">
      <div data-guide-step data-guide-scopes="" data-guide-display-scopes-list="">
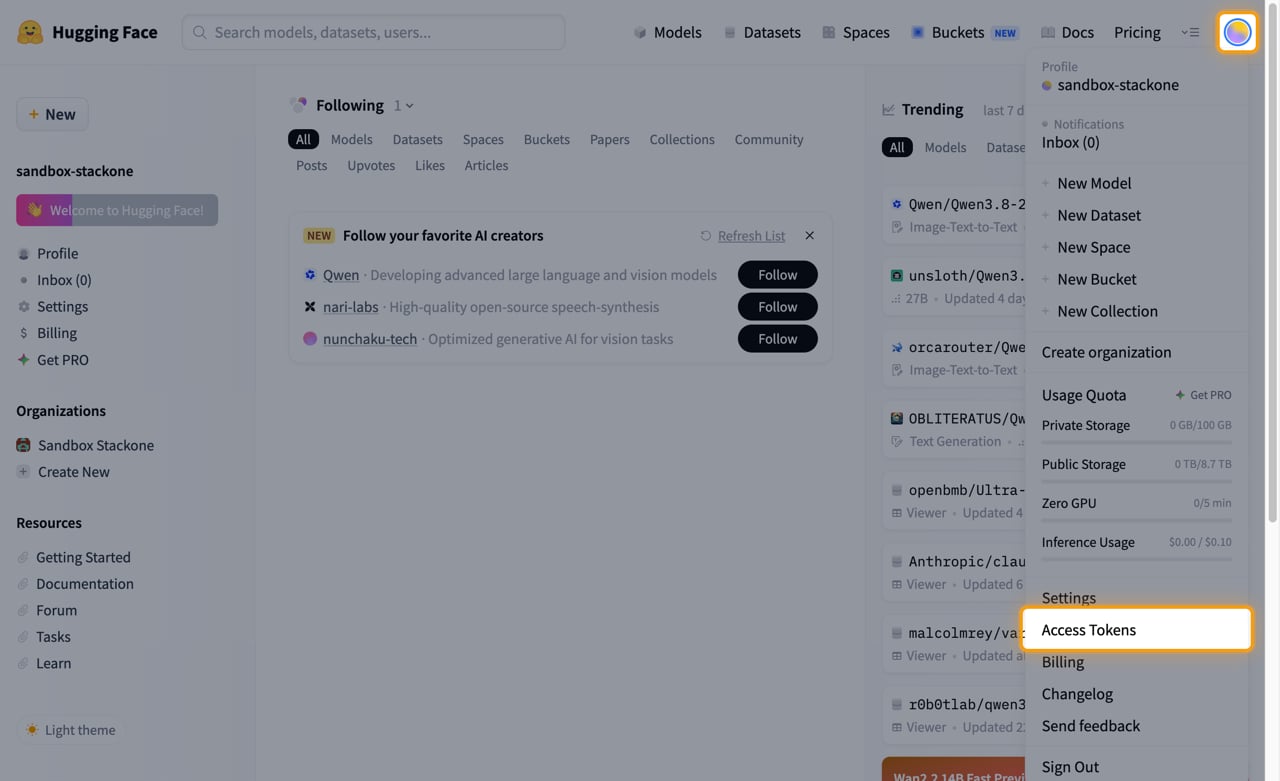
        <p>Click your avatar in the top right and choose <strong>Access Tokens</strong> — or go straight to the <a href="https://huggingface.co/settings/tokens" target="_blank" rel="noopener noreferrer">Access Tokens settings page</a>.</p>

        <img src="https://mintcdn.com/stackone-60/RT3ZGjUOVjGkKvM9/connectors/huggingface/images/custom-config-access-tokens.png?fit=max&auto=format&n=RT3ZGjUOVjGkKvM9&q=85&s=ff21a89c3ab96a5c38e6da10f74f9758" alt="Avatar menu open with the Access Tokens item highlighted" width="1280" height="781" data-path="connectors/huggingface/images/custom-config-access-tokens.png" />
      </div>
    </Step>

    <Step title="Open the new token form">
      <div data-guide-step data-guide-scopes="" data-guide-display-scopes-list="">
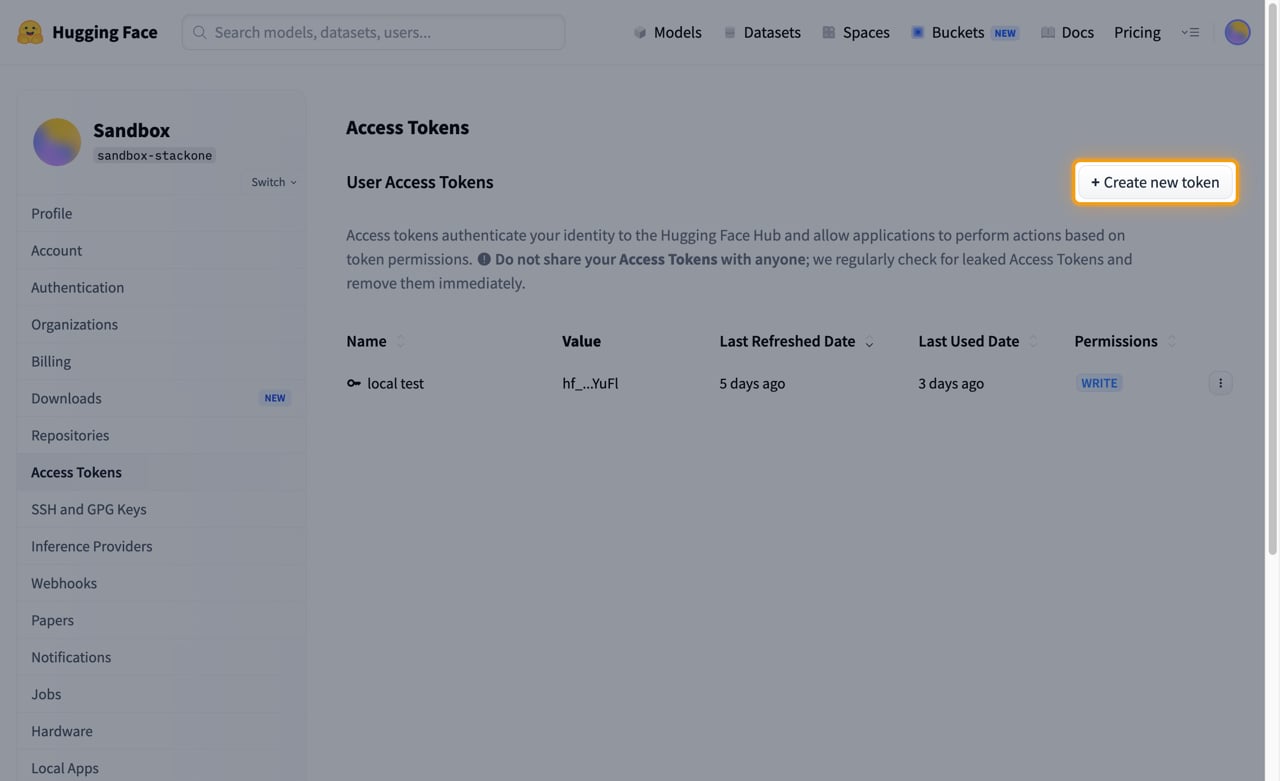
        <p>On the <strong>Access Tokens</strong> page, under <strong>User Access Tokens</strong>, click <strong>+ Create new token</strong>.</p>

        <img src="https://mintcdn.com/stackone-60/RT3ZGjUOVjGkKvM9/connectors/huggingface/images/custom-config-create-new-token.png?fit=max&auto=format&n=RT3ZGjUOVjGkKvM9&q=85&s=e5bc381e76de0941571d17a4c841eb21" alt="Access Tokens page with the Create new token button highlighted" width="1280" height="781" data-path="connectors/huggingface/images/custom-config-create-new-token.png" />
      </div>
    </Step>

    <Step title="Choose the token type and name it">
      <div data-guide-step data-guide-scopes="" data-guide-display-scopes-list="">
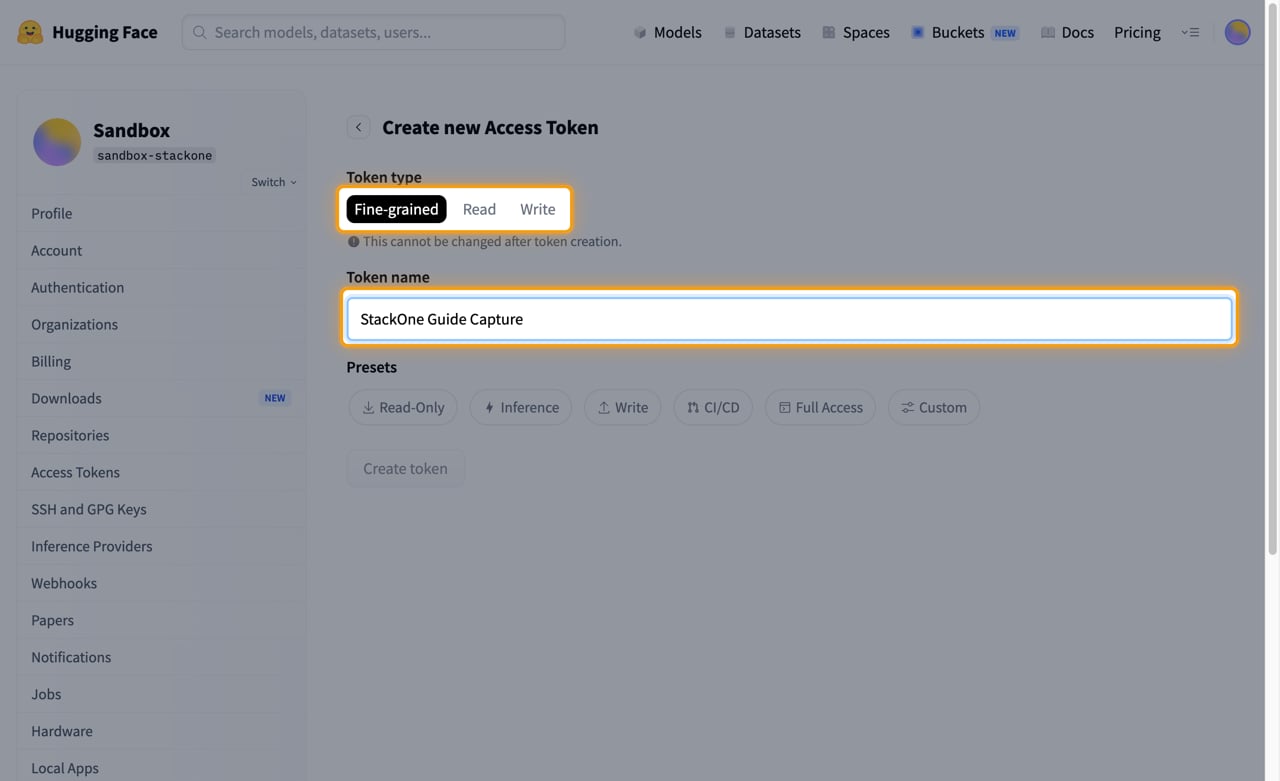
        <p>On <strong>Create new Access Token</strong>, pick a <strong>Token type</strong> and fill in <strong>Token name</strong>. Hugging Face warns that <strong>This cannot be changed after token creation.</strong></p>

        <ul>
          <li><strong>Fine-grained</strong> — recommended. Tick only the permissions you need and scope them to selected repositories or organizations.</li>
          <li><strong>Read</strong> — read access to every public and private repository you can already read.</li>
          <li><strong>Write</strong> — read plus write access to every repository you can write to.</li>
        </ul>

        <img src="https://mintcdn.com/stackone-60/RT3ZGjUOVjGkKvM9/connectors/huggingface/images/custom-config-token-type.png?fit=max&auto=format&n=RT3ZGjUOVjGkKvM9&q=85&s=a0e13973ad06766bd0c290f1b3764c68" alt="Create new Access Token form with the token type tabs and the token name field highlighted" width="1280" height="781" data-path="connectors/huggingface/images/custom-config-token-type.png" />
      </div>
    </Step>

    <Step title="Pick a preset or customize permissions">
      <div data-guide-step data-guide-scopes="" data-guide-display-scopes-list="">
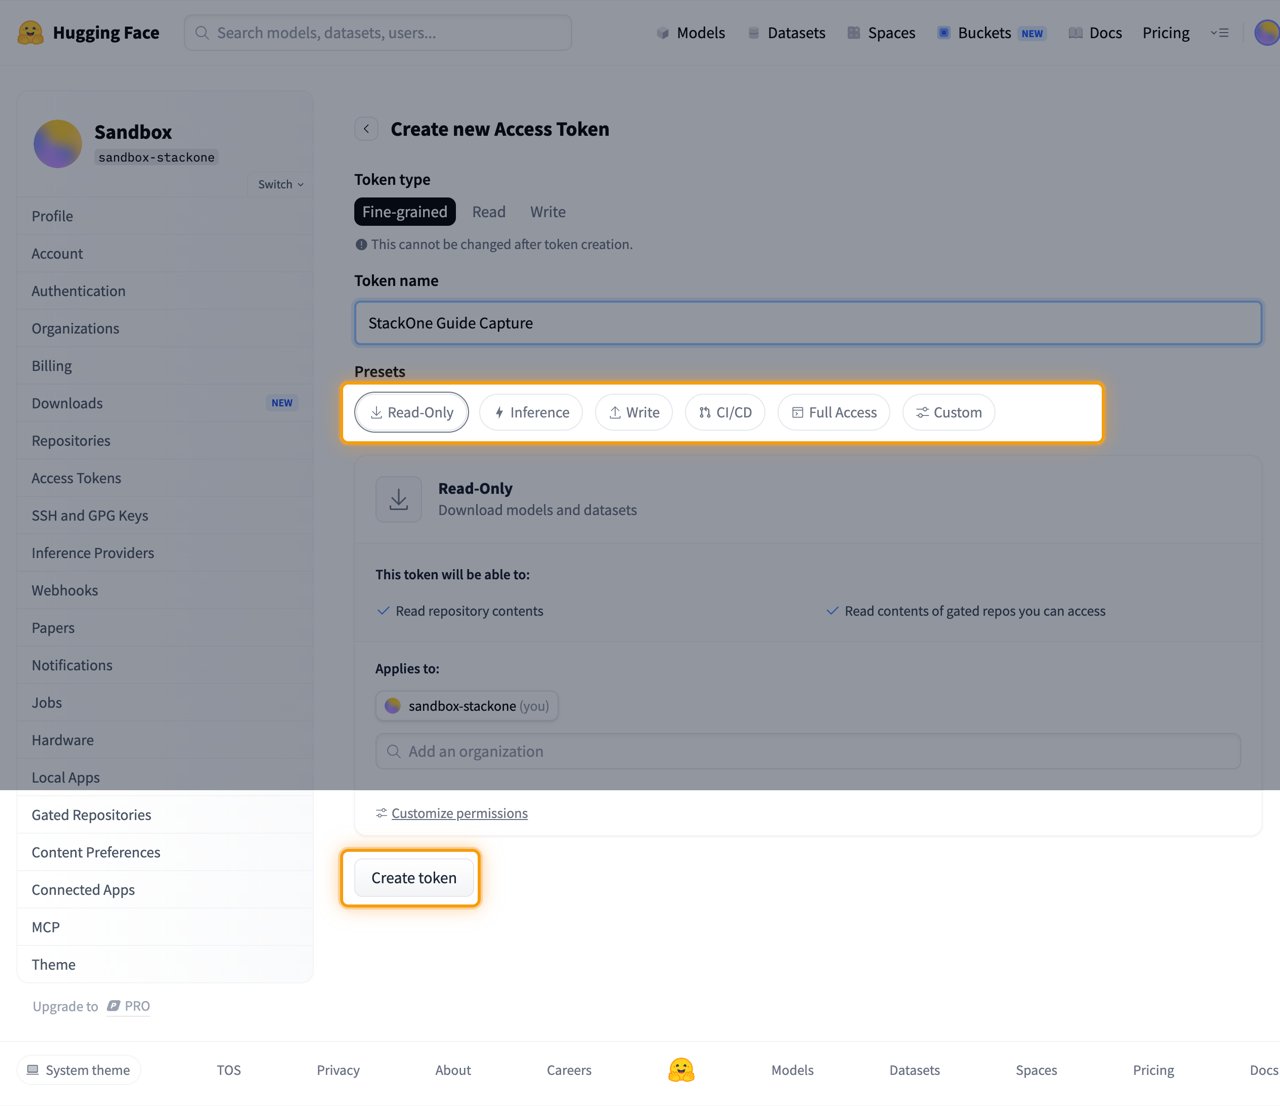
        <p>Under <strong>Presets</strong>, choose the closest starting point, then click <strong>Customize permissions</strong> to adjust it. <strong>Create token</strong> stays disabled until a preset is chosen.</p>

        <ul>
          <li><strong>Read-Only</strong> — Download models and datasets.</li>
          <li><strong>Inference</strong>, <strong>Write</strong>, <strong>CI/CD</strong>, <strong>Full Access</strong> and <strong>Custom</strong> are the other presets.</li>
          <li>Under <strong>Applies to:</strong>, your own namespace is included; use <strong>Add an organization</strong> to extend the token to an organization.</li>
        </ul>

        <img src="https://mintcdn.com/stackone-60/RT3ZGjUOVjGkKvM9/connectors/huggingface/images/custom-config-presets.png?fit=max&auto=format&n=RT3ZGjUOVjGkKvM9&q=85&s=87a5795203ae28af7597a689f658e4eb" alt="Presets row with the Read-Only preset selected and the Create token button highlighted" width="1280" height="1106" data-path="connectors/huggingface/images/custom-config-presets.png" />
      </div>
    </Step>

    <Step title="Create the token and copy it">
      <div data-guide-step data-guide-scopes="" data-guide-display-scopes-list="">
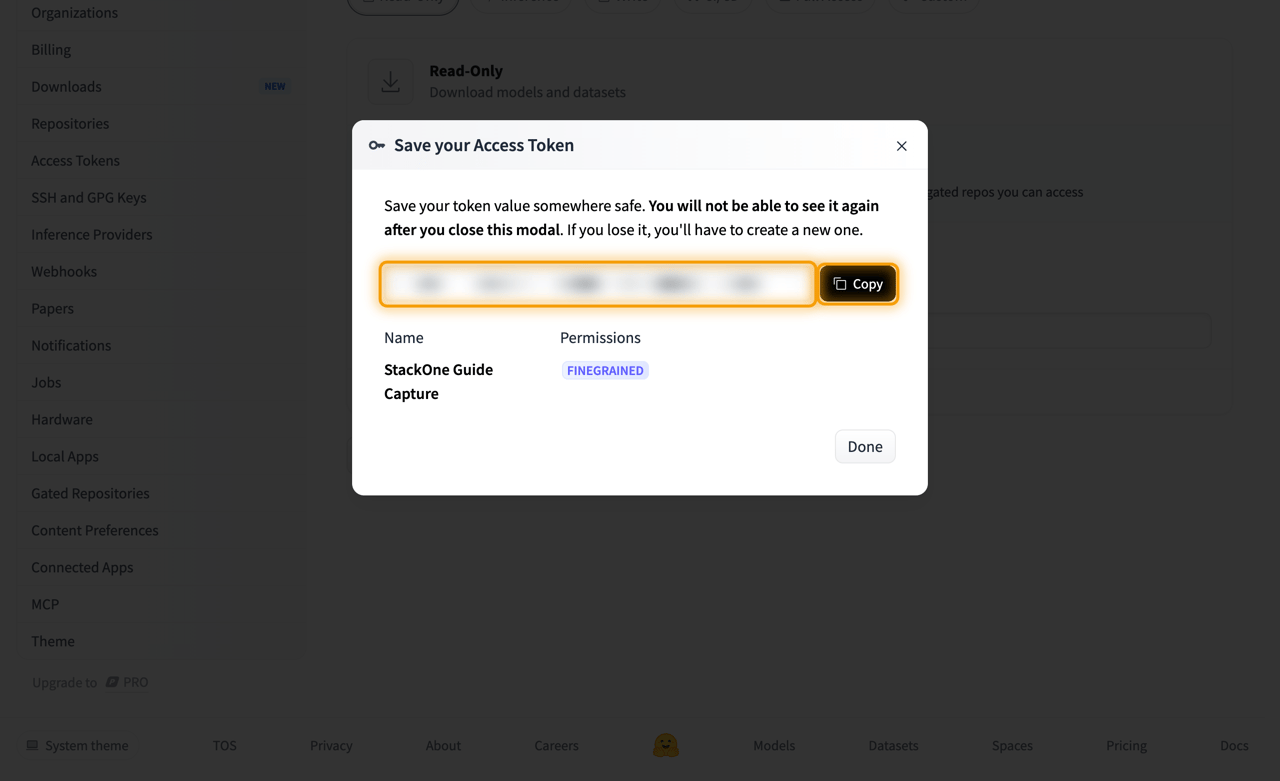
        <p>Click <strong>Create token</strong>. Hugging Face shows <strong>Save your Access Token</strong> with the value and a <strong>Copy</strong> button. Copy it, then paste it into the <strong>User Access Token</strong> field in StackOne Hub.</p>

        <ul>
          <li>The token value is only displayed once and cannot be retrieved later — close the modal with <strong>Done</strong> only after you have copied it.</li>
          <li>The value starts with `hf_`.</li>
        </ul>

        <img src="https://mintcdn.com/stackone-60/RT3ZGjUOVjGkKvM9/connectors/huggingface/images/custom-config-copy-token.png?fit=max&auto=format&n=RT3ZGjUOVjGkKvM9&q=85&s=168a4da8e82abaf9480b47cea5f84f3a" alt="Save your Access Token modal with the token value redacted and the Copy button highlighted" width="1280" height="781" data-path="connectors/huggingface/images/custom-config-copy-token.png" />
      </div>
    </Step>
  </Steps>
</section>

<section data-guide-section data-guide-scopes="">
  <h2>Permissions to select on a fine-grained token</h2>

  <p>Choosing the <strong>Custom</strong> preset opens the full permission list. Tick the entries matching the actions you plan to run.</p>

  <Steps>
    <Step title="Select the permissions this connector needs">
      <div data-guide-step data-guide-scopes="" data-guide-display-scopes-list="">
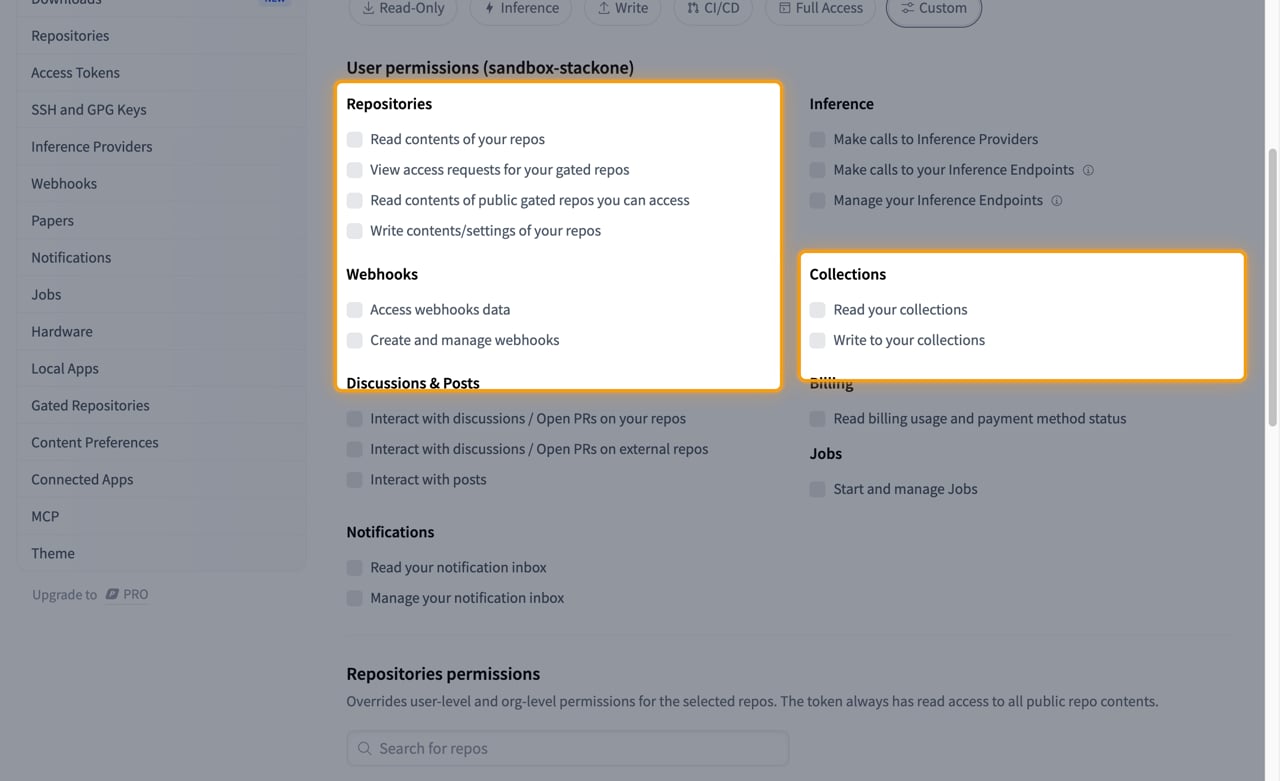
        <p>Under <strong>User permissions</strong>, the groups below carry the permissions the connector's actions use.</p>

        <ul>
          <li><strong>Read contents of your repos</strong> — required for every model, dataset and Space read action.</li>
          <li><strong>Write contents/settings of your repos</strong> — required for commits, branches, tags and repository settings.</li>
          <li><strong>Read contents of public gated repos you can access</strong> and <strong>View access requests for your gated repos</strong> — required for the gated-repository actions.</li>
          <li><strong>Interact with discussions / Open PRs on your repos</strong> and <strong>Interact with discussions / Open PRs on external repos</strong> — required for the discussion and pull request actions.</li>
          <li><strong>Read your collections</strong> and <strong>Write to your collections</strong> — required for the collection actions.</li>
          <li><strong>Read billing usage and payment method status</strong> — required for the usage and billing actions.</li>
          <li><strong>Read org settings</strong> — required for the organization member actions.</li>
          <li>Use <strong>Repositories permissions</strong> below the user permissions to override these for individually selected repositories.</li>
        </ul>

        <img src="https://mintcdn.com/stackone-60/RT3ZGjUOVjGkKvM9/connectors/huggingface/images/custom-config-permissions.png?fit=max&auto=format&n=RT3ZGjUOVjGkKvM9&q=85&s=bc8da724a922972141273f90fae3a3de" alt="Custom permission list with the Repositories and Collections groups highlighted" width="1280" height="781" data-path="connectors/huggingface/images/custom-config-permissions.png" />
      </div>
    </Step>
  </Steps>
</section>

<section data-guide-section data-guide-scopes="">
  <h2>Organizations with token policies</h2>

  <p>Organizations on the Team and Enterprise plans can restrict which tokens reach their resources.</p>

  <ul>
    <li>A fine-grained token scoped to such an organization starts as <strong>Pending</strong> until an administrator approves it, and returns `403` against that organization's resources until then.</li>
    <li>Some organizations reject read and write tokens outright and accept only fine-grained tokens.</li>
  </ul>
</section>

<div data-whitelabel-hide>
  <h2>Linking the Account from the Hub</h2>

  <Steps>
    <Step title="Navigate to the Hub">
      Use one of the three <a href="/connect/managing-connectors/linking-accounts">Linking Account Methods</a> to access the Hub.
    </Step>

    <Step title="Fill out the fields">
      Fill out the following fields using details from your provider:

      <ul>
        <li><strong>User Access Token</strong></li>
      </ul>
    </Step>

    <Step title="Connect">
      <ul>
        <li>Click <strong>Connect</strong></li>
        <li>If applicable, the provider will redirect you to a sign-in or authorization page. Complete the provider's authorization flow.</li>
        <li>Once authorization is successful, you will see a confirmation popup</li>
      </ul>
    </Step>
  </Steps>

  <p>If the account linking is successful, you will see the newly linked account in your <a href="/gateway/concepts/linked-accounts">Accounts</a> page.</p>
</div>