> ## Documentation Index
> Fetch the complete documentation index at: https://docs.stackone.com/llms.txt
> Use this file to discover all available pages before exploring further.

# Eka Care Client Credentials connector profile – StackOne setup guide

> Set up the Client Credentials connector profile for Eka Care in StackOne. One-time admin setup required before your users can link Eka Care accounts via Hub.

<section data-guide-section data-guide-scopes="">
  <h2>Creating API credentials</h2>

  <p>An API credential (a Client ID and Client Secret) lets StackOne request short-lived access tokens for your Eka workspace.</p>

  <Steps>
    <Step title="Sign in to Eka Console">
      <div data-guide-step data-guide-scopes="" data-guide-display-scopes-list="">
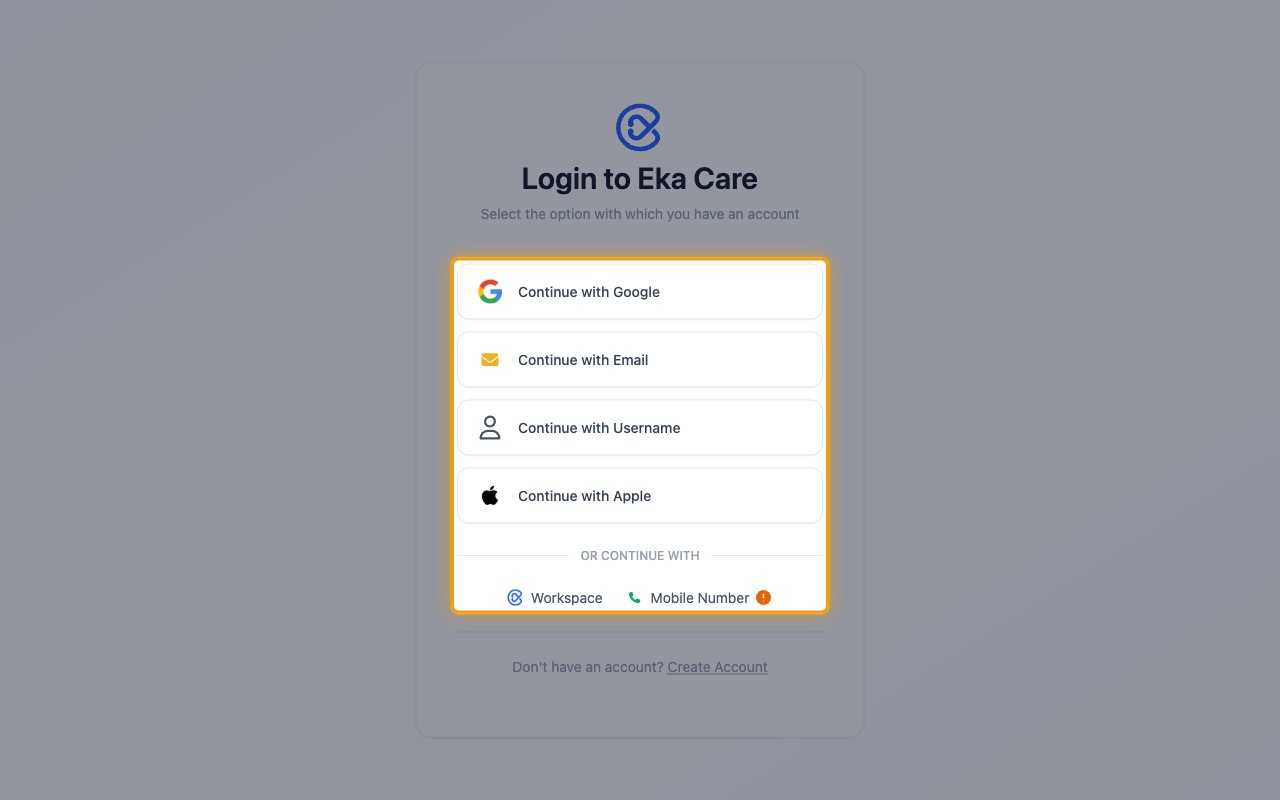
        <p>Sign in to your <a href="https://console.eka.care/" target="_blank" rel="noopener noreferrer">Eka Console account</a>.</p>

        <ul>
          <li>Choose the sign-in method you use, such as <strong>Continue with Email</strong>.</li>
        </ul>

        <img src="https://mintcdn.com/stackone-60/2aitSsNAQhtZqow7/connectors/ekacare/images/oauth2-setup-sign-in.png?fit=max&auto=format&n=2aitSsNAQhtZqow7&q=85&s=7a5ce4c06cd62dc700bf69ceb7a5decd" alt="The Login to Eka Care page with the sign-in options highlighted" width="1280" height="800" data-path="connectors/ekacare/images/oauth2-setup-sign-in.png" />
      </div>
    </Step>

    <Step title="Open API credentials">
      <div data-guide-step data-guide-scopes="" data-guide-display-scopes-list="">
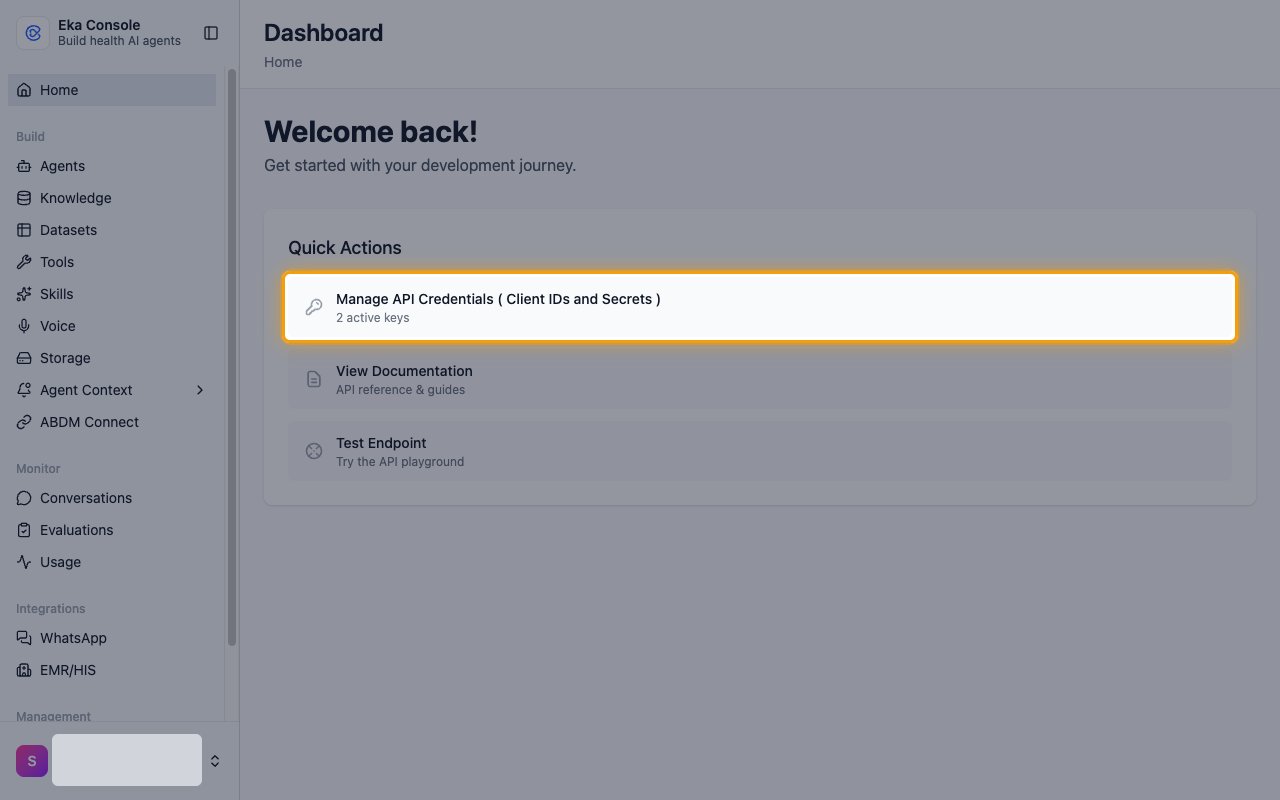
        <p>On the <strong>Dashboard</strong>, under <strong>Quick Actions</strong>, click <strong>Manage API Credentials ( Client IDs and Secrets )</strong>.</p>

        <img src="https://mintcdn.com/stackone-60/2aitSsNAQhtZqow7/connectors/ekacare/images/oauth2-setup-quick-actions.png?fit=max&auto=format&n=2aitSsNAQhtZqow7&q=85&s=f96296bbdd33d3003a0abc581a60c2cb" alt="The Eka Console dashboard with Manage API Credentials highlighted under Quick Actions" width="1280" height="800" data-path="connectors/ekacare/images/oauth2-setup-quick-actions.png" />
      </div>
    </Step>

    <Step title="Start a new credential">
      <div data-guide-step data-guide-scopes="" data-guide-display-scopes-list="">
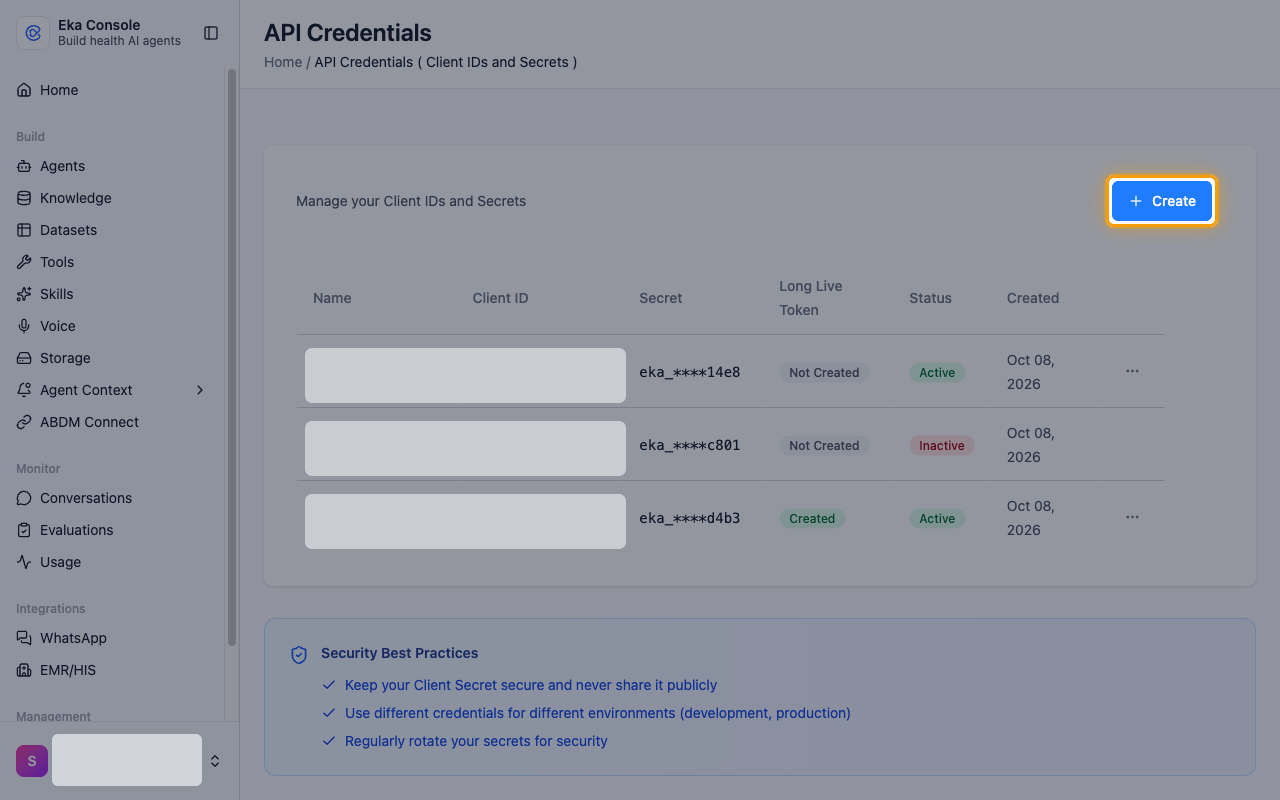
        <p>On the <strong>API Credentials</strong> page, click <strong>Create</strong>.</p>

        <img src="https://mintcdn.com/stackone-60/2aitSsNAQhtZqow7/connectors/ekacare/images/oauth2-setup-api-credentials.png?fit=max&auto=format&n=2aitSsNAQhtZqow7&q=85&s=1101d91e7bac26ad4eafe96f4ca9ee24" alt="The API Credentials page with the Create button highlighted" width="1280" height="800" data-path="connectors/ekacare/images/oauth2-setup-api-credentials.png" />
      </div>
    </Step>

    <Step title="Name the credential">
      <div data-guide-step data-guide-scopes="" data-guide-display-scopes-list="">
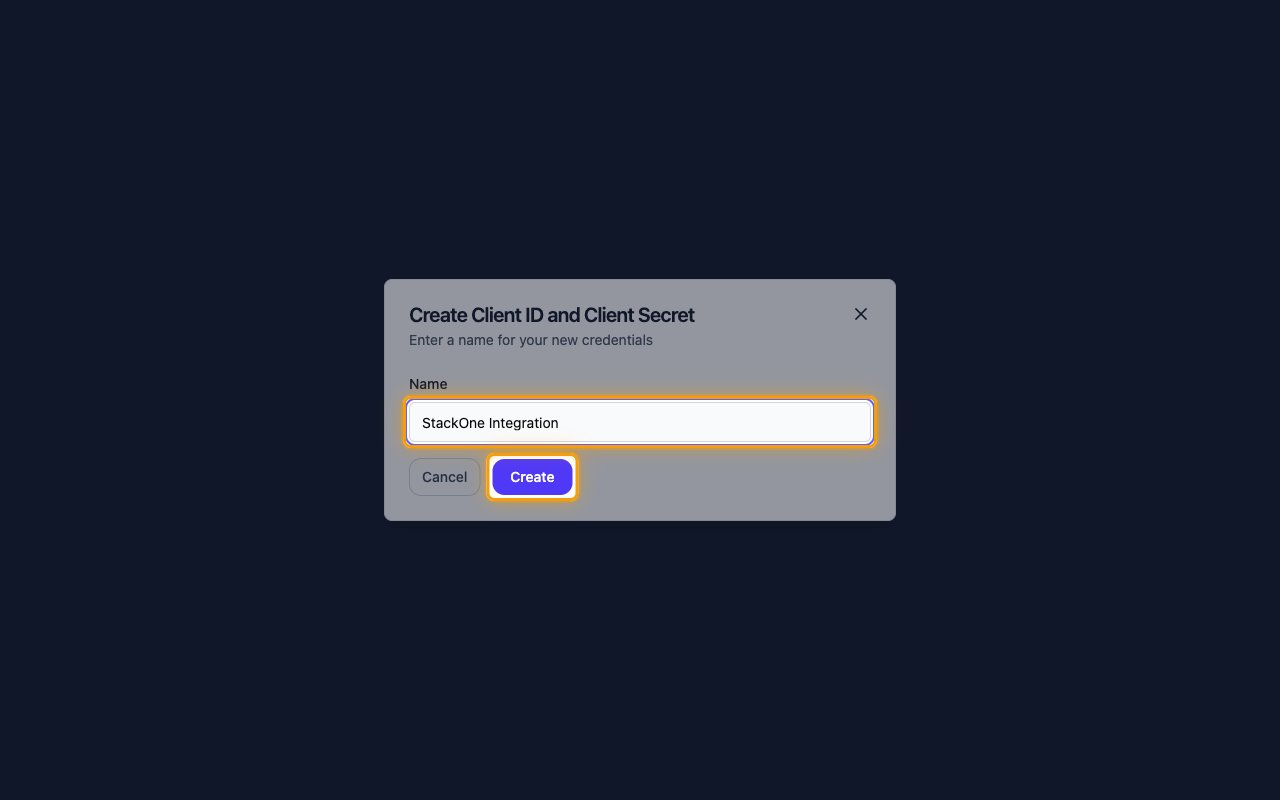
        <p>In <strong>Create Client ID and Client Secret</strong>, enter a <strong>Name</strong> and click <strong>Create</strong>.</p>

        <ul>
          <li>Name: `StackOne Integration`</li>
        </ul>

        <img src="https://mintcdn.com/stackone-60/2aitSsNAQhtZqow7/connectors/ekacare/images/oauth2-setup-create-credential.png?fit=max&auto=format&n=2aitSsNAQhtZqow7&q=85&s=900d32cb637abb14ae131f8f98f3e88c" alt="The Create Client ID and Client Secret form with the Name field and Create button highlighted" width="1280" height="800" data-path="connectors/ekacare/images/oauth2-setup-create-credential.png" />
      </div>
    </Step>

    <Step title="Copy the Client Secret">
      <div data-guide-step data-guide-scopes="" data-guide-display-scopes-list="">
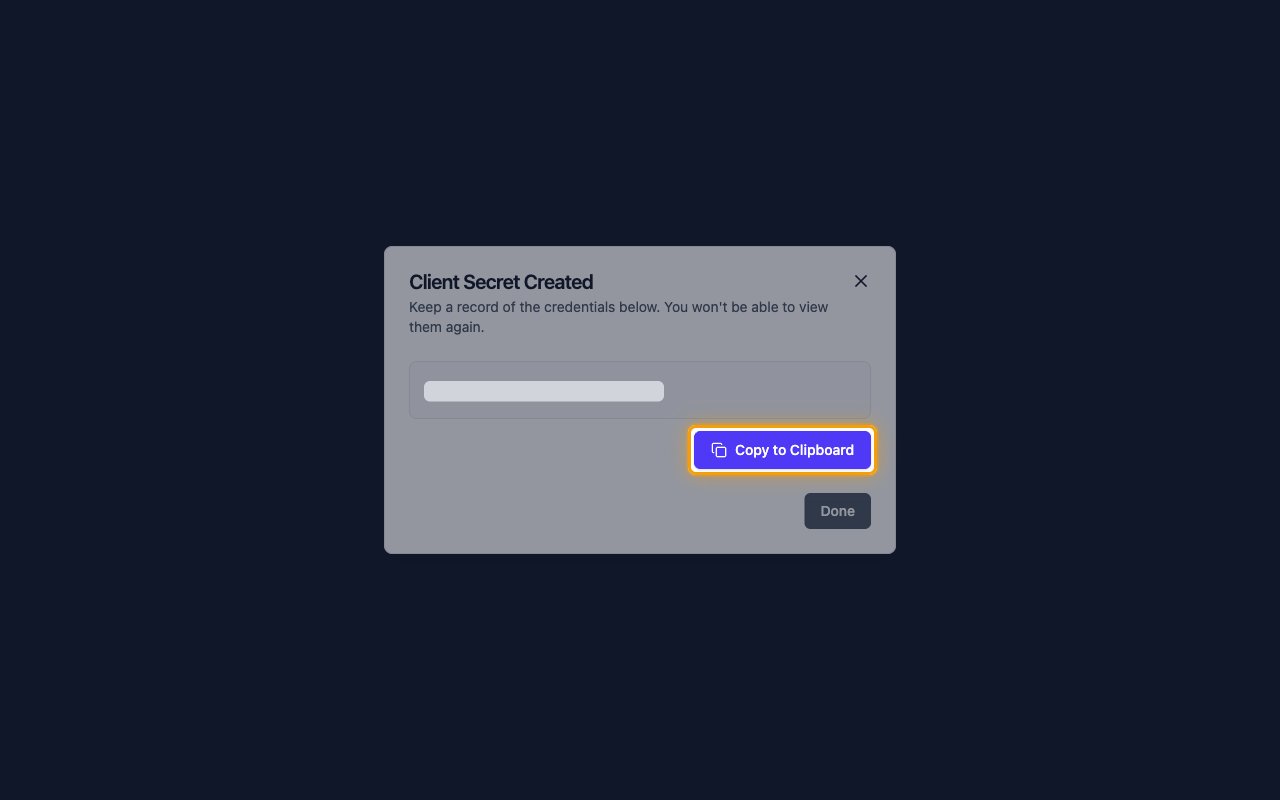
        <p>In <strong>Client Secret Created</strong>, click <strong>Copy to Clipboard</strong> and paste the value into the <strong>Client Secret</strong> field in the StackOne Connector profile.</p>

        <ul>
          <li>The Client Secret is only displayed once and cannot be retrieved later. Store it securely for use later.</li>
          <li>Click <strong>Done</strong>.</li>
        </ul>

        <img src="https://mintcdn.com/stackone-60/2aitSsNAQhtZqow7/connectors/ekacare/images/oauth2-setup-copy-secret.png?fit=max&auto=format&n=2aitSsNAQhtZqow7&q=85&s=3cf39936e7c19da5f11741ab790c7708" alt="The Client Secret Created dialog with the secret hidden and Copy to Clipboard highlighted" width="1280" height="800" data-path="connectors/ekacare/images/oauth2-setup-copy-secret.png" />
      </div>
    </Step>

    <Step title="Copy the Client ID">
      <div data-guide-step data-guide-scopes="" data-guide-display-scopes-list="">
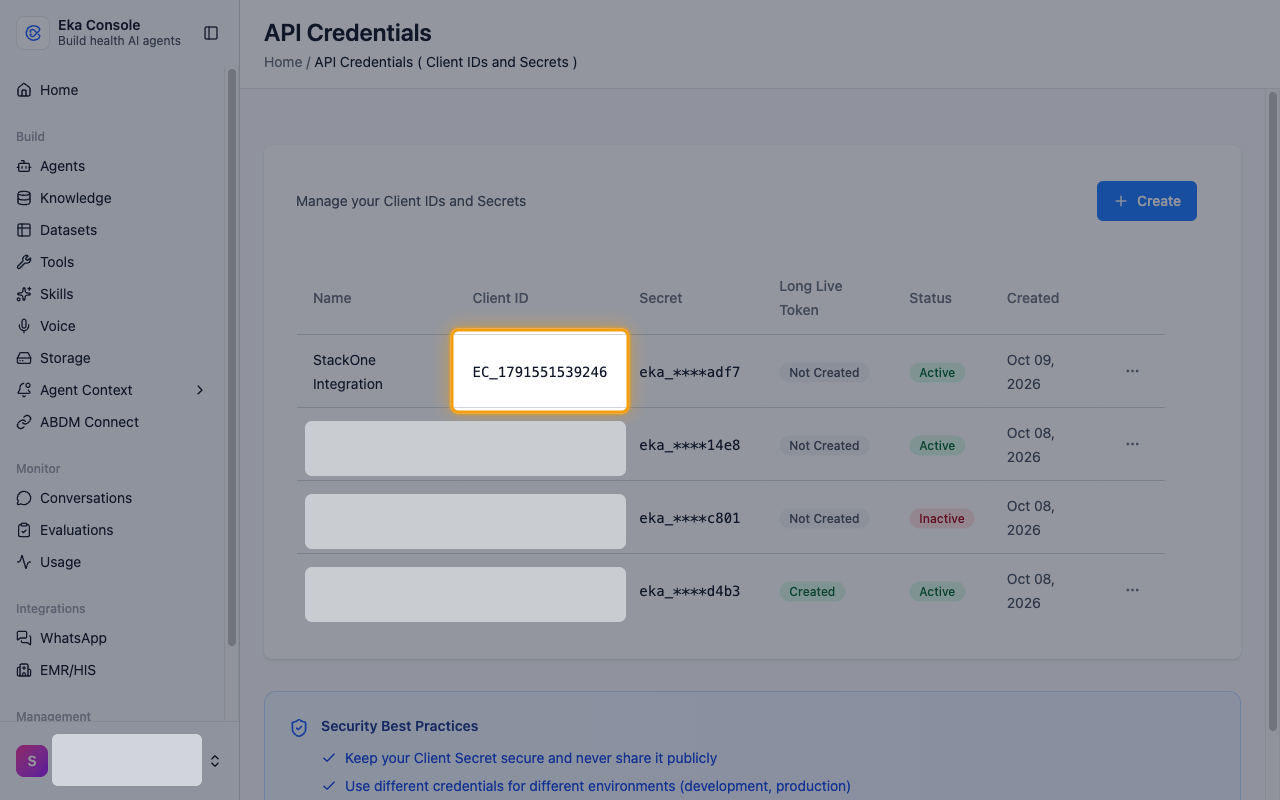
        <p>Back on <strong>API Credentials</strong>, copy the <strong>Client ID</strong> of your new credential and paste it into the <strong>Client ID</strong> field in the StackOne Connector profile.</p>

        <ul>
          <li>Format: `EC_` followed by digits</li>
          <li>Example: `EC_178843954824934`</li>
        </ul>

        <img src="https://mintcdn.com/stackone-60/2aitSsNAQhtZqow7/connectors/ekacare/images/oauth2-setup-client-id.png?fit=max&auto=format&n=2aitSsNAQhtZqow7&q=85&s=1006b04cd1420b92b8da3778f7a85bca" alt="The API Credentials list with the Client ID of the new credential highlighted" width="1280" height="800" data-path="connectors/ekacare/images/oauth2-setup-client-id.png" />
      </div>
    </Step>
  </Steps>
</section>

## Creating the StackOne Connector Profile

To create the Connector Profile in StackOne for <strong>Eka Care</strong>:

<Steps>
  <Step title="Navigate to Connector Profiles">
    Login to StackOne and navigate to [Connector Profiles](https://app.stackone.com/connector_profiles)
  </Step>

  <Step title="Create New Connector Profile">
    <ul>
      <li>Click <strong>+ Connector Profile</strong></li>
      <li>Search for and select <strong>Eka Care</strong></li>
      <li>Select <strong>Type</strong> as <strong>Client Credentials</strong></li>

      <li>
        Fill out the fields using details retrieved from your provider:

        <ul className="connector-guide-field-list">
          <li><strong>Client ID</strong></li>
          <li><strong>Client Secret</strong></li>
        </ul>
      </li>

      <li>(Optional) Select <strong>Actions</strong> to be enabled for this Connector Profile</li>
      <li>Click <strong>Create profile</strong></li>
    </ul>
  </Step>
</Steps>

Congratulations! The new Connector Profile will now show up in your project ready to be used. You can now continue to <a href="/connect/managing-connectors/linking-accounts">Link Accounts</a> for <strong>Eka Care</strong>.


This documentation is built and hosted on [Mintlify](https://mintlify.com), a developer documentation platform.