> ## Documentation Index
> Fetch the complete documentation index at: https://docs.stackone.com/llms.txt
> Use this file to discover all available pages before exploring further.

# Connect Alchemy with API Key – StackOne Hub

> Link a Alchemy account in the StackOne Hub using API Key. End-user guide to authorize the integration and start using Alchemy actions.

<Warning>The API Key is app-scoped (one key per Alchemy App). Enable the networks you want to query in the Alchemy dashboard before connecting — the Default Network field must match a subdomain enabled on your App.</Warning>

<section data-guide-section data-guide-scopes="">
  <h2>Create an Alchemy App</h2>

  <p>Register a free Alchemy account and create an App to get an <strong>API Key</strong>.</p>

  <Steps>
    <Step title="Sign up for Alchemy">
      <div data-guide-step data-guide-scopes="" data-guide-display-scopes-list="">
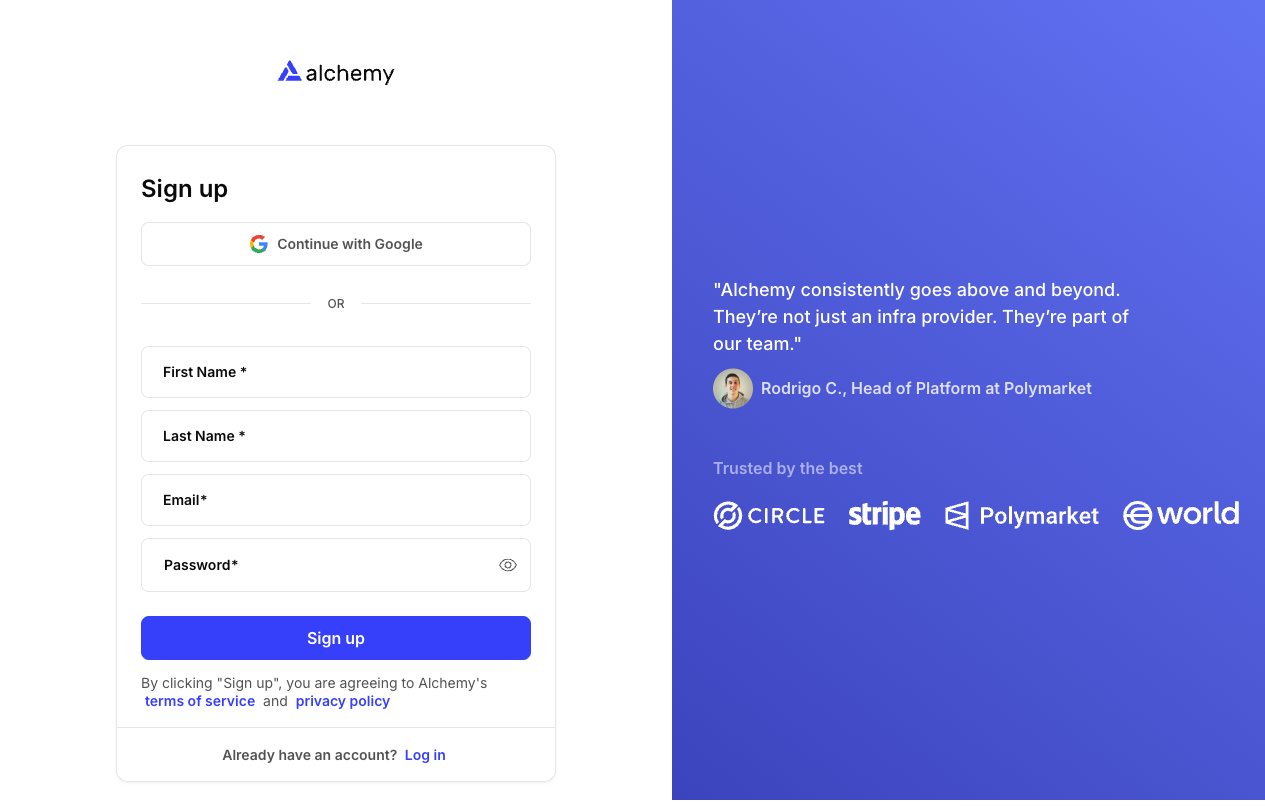
        <p>Open the <a href="https://dashboard.alchemy.com/signup" target="_blank" rel="noopener noreferrer">Alchemy Sign up page</a> and register with <strong>First Name</strong>, <strong>Last Name</strong>, <strong>Email</strong>, and <strong>Password</strong> — or click <strong>Continue with Google</strong>. Existing users can click <strong>Log in</strong> at the bottom of the form.</p>

        <img src="https://mintcdn.com/stackone-60/iucz7h0y8s0R_AjH/connectors/alchemy/images/custom-config-signup.png?fit=max&auto=format&n=iucz7h0y8s0R_AjH&q=85&s=623cd7ba6bb50d786c9c8c8eecc34afe" alt="The Alchemy Sign up form with First Name, Last Name, Email, Password fields and a Continue with Google button." width="1265" height="806" data-path="connectors/alchemy/images/custom-config-signup.png" />
      </div>
    </Step>

    <Step title="Create a new app">
      <div data-guide-step data-guide-scopes="" data-guide-display-scopes-list="">
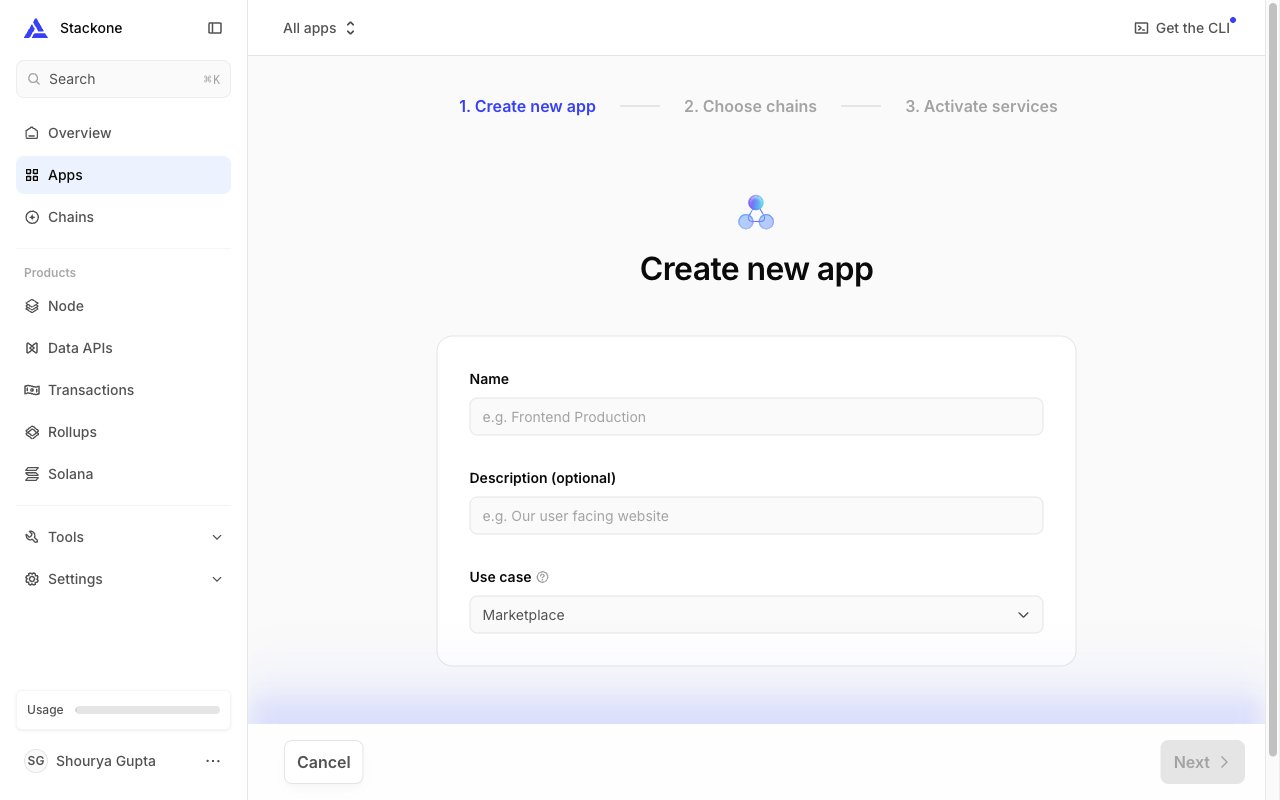
        <p>On the <strong>Apps</strong> page, click <strong>+ Create new app</strong> in the top-right. Fill in <strong>Name</strong>, an optional <strong>Description</strong>, and pick a <strong>Use case</strong>, then click <strong>Next</strong>. On the following step choose a starter chain and network — you can enable more networks later without recreating the App.</p>

        <img src="https://mintcdn.com/stackone-60/iucz7h0y8s0R_AjH/connectors/alchemy/images/custom-config-create-app.png?fit=max&auto=format&n=iucz7h0y8s0R_AjH&q=85&s=5ae4495f43acbe517cf483e5c0e9d985" alt="The Create new app form with Name, Description (optional) and Use case fields, and a Next button in the bottom-right." width="1280" height="800" data-path="connectors/alchemy/images/custom-config-create-app.png" />
      </div>
    </Step>

    <Step title="Copy the API Key">
      <div data-guide-step data-guide-scopes="" data-guide-display-scopes-list="">
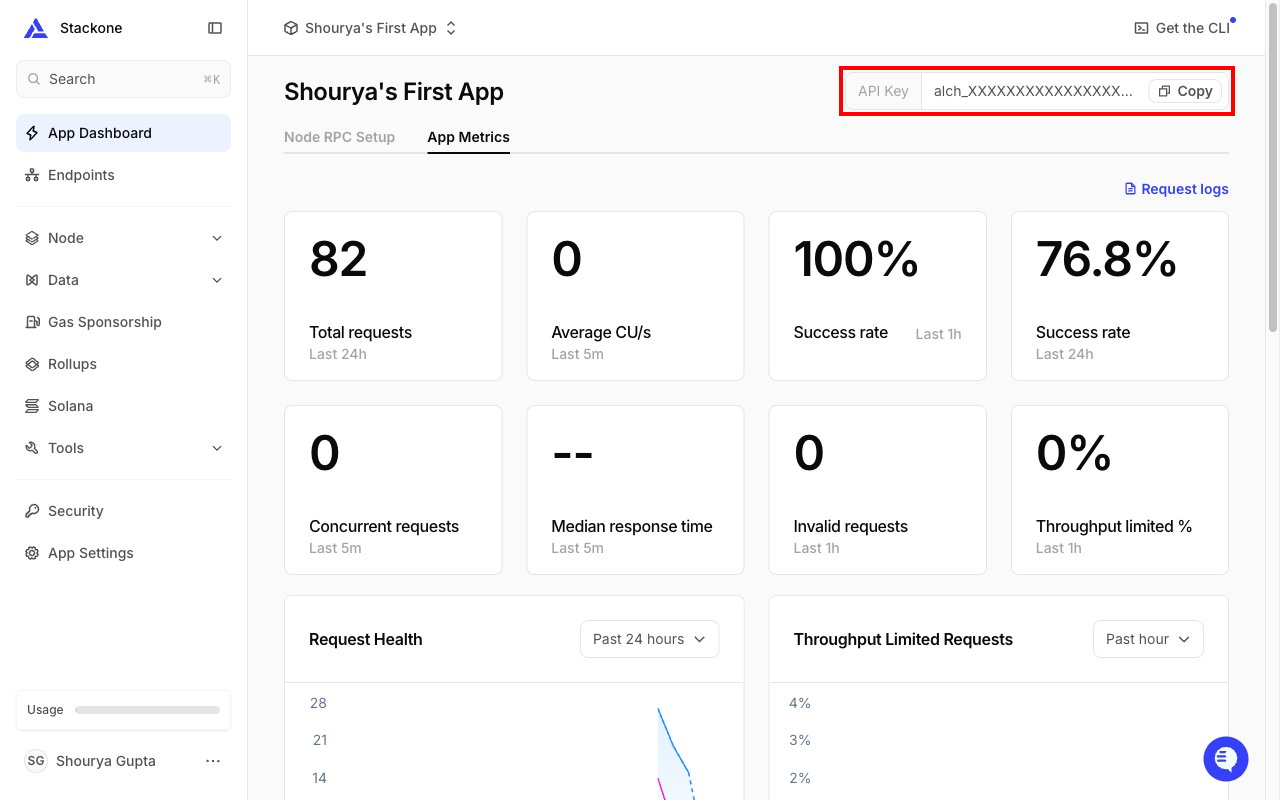
        <p>Open the App from the <strong>Apps</strong> list to reach the <strong>App Dashboard</strong>. The <strong>API Key</strong> is shown in the top-right of the page next to a <strong>Copy</strong> button. Copy the value and paste it into the <strong>API Key</strong> field in StackOne.</p>

        <img src="https://mintcdn.com/stackone-60/iucz7h0y8s0R_AjH/connectors/alchemy/images/custom-config-api-key.png?fit=max&auto=format&n=iucz7h0y8s0R_AjH&q=85&s=7b53a3d064026aadead44e01378e43b5" alt="The App Dashboard with the API Key field and Copy button highlighted in the top-right." width="1280" height="800" data-path="connectors/alchemy/images/custom-config-api-key.png" />
      </div>
    </Step>
  </Steps>
</section>

<section data-guide-section data-guide-scopes="">
  <h2>Enter the default network</h2>

  <p>The <strong>Default Network</strong> field is a plain-text chain subdomain used for chain-scoped actions (NFT v3, Token, Transfers, Utility, RPC). Chain-agnostic Portfolio and Prices actions accept a networks list in the request body and ignore this setting.</p>

  <Steps>
    <Step title="Open the Endpoints tab">
      <div data-guide-step data-guide-scopes="" data-guide-display-scopes-list="">
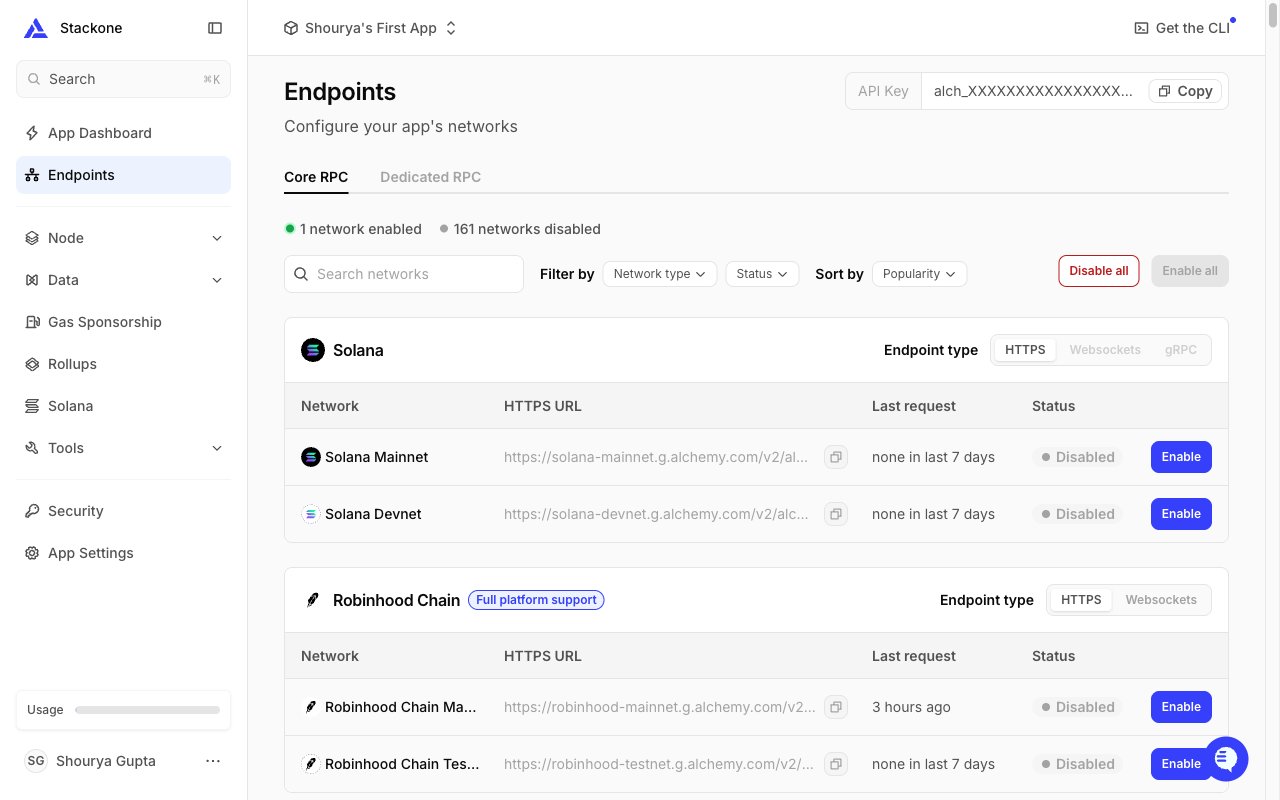
        <p>On the App page in the Alchemy dashboard, click <strong>Endpoints</strong> in the left sidebar. Under <strong>Core RPC</strong> you'll see each enabled network with an <strong>HTTPS URL</strong> column — for example `https://eth-mainnet.g.alchemy.com/v2/alch_XXXXXXXXXXXX`.</p>

        <img src="https://mintcdn.com/stackone-60/iucz7h0y8s0R_AjH/connectors/alchemy/images/custom-config-endpoints.png?fit=max&auto=format&n=iucz7h0y8s0R_AjH&q=85&s=b583df1e07f334cd3df5ad4e51ae1895" alt="The Endpoints page showing the Core RPC tab with a Network column and an HTTPS URL column for each enabled chain." width="1280" height="800" data-path="connectors/alchemy/images/custom-config-endpoints.png" />
      </div>
    </Step>

    <Step title="Copy the subdomain from the HTTPS URL">
      <div data-guide-step data-guide-scopes="" data-guide-display-scopes-list="">
        <p>The subdomain is everything between the scheme and `.g.alchemy.com`. From `eth-mainnet.g.alchemy.com/v2/…` copy the value `eth-mainnet` and paste it into the <strong>Default Network</strong> field in StackOne.</p>
      </div>
    </Step>

    <Step title="Pick a value from the supported chains">
      <div data-guide-step data-guide-scopes="" data-guide-display-scopes-list="">
        <p>Ethereum: `eth-mainnet`, `eth-sepolia`, `eth-holesky`. Base: `base-mainnet`, `base-sepolia`. Polygon: `polygon-mainnet`, `polygon-amoy`. Arbitrum: `arb-mainnet`, `arb-sepolia`. Optimism: `opt-mainnet`, `opt-sepolia`. Others: `avax-mainnet`, `bnb-mainnet`, `linea-mainnet`, `zksync-mainnet`, `shape-mainnet`, `worldchain-mainnet`, `monad-testnet`, `apechain-mainnet`, `sonic-mainnet`, `scroll-mainnet`, `soneium-mainnet`, `solana-mainnet`, and 70+ more — any subdomain that appears in your App's <strong>HTTPS URL</strong> list works.</p>
      </div>
    </Step>
  </Steps>
</section>

<div data-whitelabel-hide>
  <h2>Linking the Account from the Hub</h2>

  <Steps>
    <Step title="Navigate to the Hub">
      Use one of the three <a href="/connect/managing-connectors/linking-accounts">Linking Account Methods</a> to access the Hub.
    </Step>

    <Step title="Fill out the fields">
      Fill out the following fields using details from your provider:

      <ul>
        <li><strong>API Key</strong></li>
        <li><strong>Default Network</strong></li>
      </ul>
    </Step>

    <Step title="Connect">
      <ul>
        <li>Click <strong>Connect</strong></li>
        <li>If applicable, the provider will redirect you to a sign-in or authorization page. Complete the provider's authorization flow.</li>
        <li>Once authorization is successful, you will see a confirmation popup</li>
      </ul>
    </Step>
  </Steps>

  <p>If the account linking is successful, you will see the newly linked account in your <a href="/gateway/concepts/linked-accounts">Accounts</a> page.</p>
</div>