> ## Documentation Index
> Fetch the complete documentation index at: https://docs.stackone.com/llms.txt
> Use this file to discover all available pages before exploring further.
# Claude Desktop & Web
> Connect StackOne MCP to Claude on desktop, web and mobile as a custom connector with OAuth.
## Overview
[Claude](https://claude.ai) connects to remote MCP servers as **custom connectors**, running the OAuth flow itself, with no config file and no `mcp-remote` wrapper. A connector is added once against your account and is then available in Claude on desktop, web and mobile.
Custom connectors are available on Free, Pro, Max, Team and Enterprise plans, with Free limited to one. See Anthropic's [guide to custom connectors](https://support.claude.com/en/articles/11175166-get-started-with-custom-connectors-using-remote-mcp) for the current flow.
## Prerequisites
* A StackOne [project](/gateway/concepts/organizations-and-projects) you are a member of.
* A [connector profile](/gateway/concepts/connector-profiles) in the project for each provider the client should reach, with the actions you want exposed enabled.
* (Optional) A [linked account](/gateway/concepts/linked-accounts) for each provider. Accounts can also be linked during the consent flow.
## Setup
How you add the connector depends on your Claude plan. On Pro and Max you add it yourself, and on Team and Enterprise an Owner adds it for everyone.
1. Go to **Customize → Connectors**.
2. Open the **Add** dropdown and select **Add custom connector**.
3. Set the name (e.g. `StackOne`) and the **Remote MCP Server URL**:
```
https://mcp.stackone.com/mcp
```
4. Leave the **OAuth client ID** and **secret** fields empty (Claude discovers the endpoints and registers itself).
5. Click **Add**.
1. Go to **Organization settings → Connectors**.
2. Click **Add**, hover over **Custom**, then select **Web**.
3. Set the **Remote MCP Server URL**:
```
https://mcp.stackone.com/mcp
```
4. Leave the OAuth credentials under **Advanced settings** empty (Claude discovers the endpoints and registers itself).
5. Click **Add**.
Under **Customize → Connectors**, click **Connect** on the StackOne connector.
Claude opens StackOne in your browser.
Sign in, pick the project and the [linked accounts](/gateway/concepts/linked-accounts) the connector should reach, then **Authorize**.
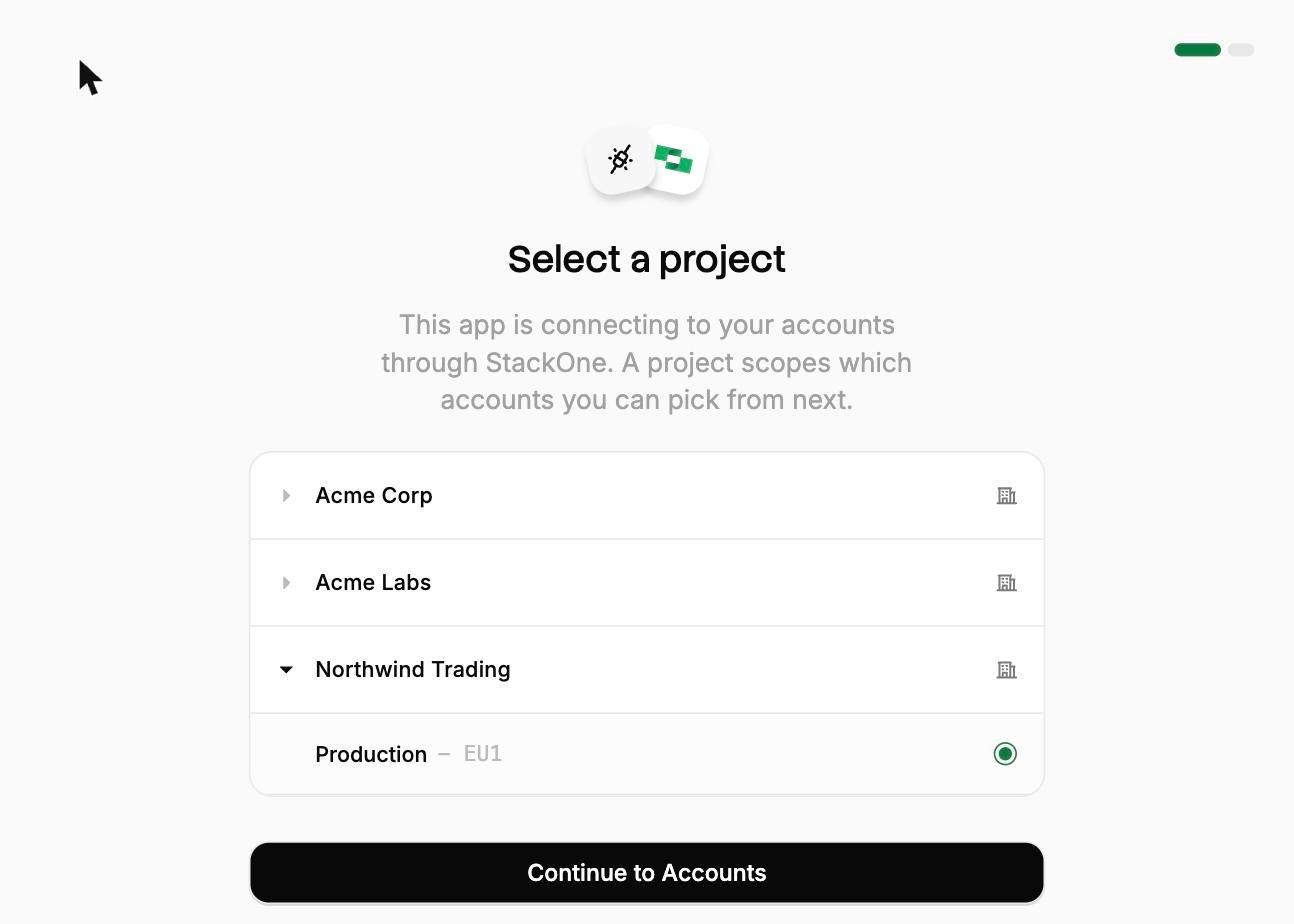
1. **Sign in to StackOne.** If you are already signed in to the dashboard you skip straight to the next step.
2. **Select a project.** Select the project you would like to associate the connection with.
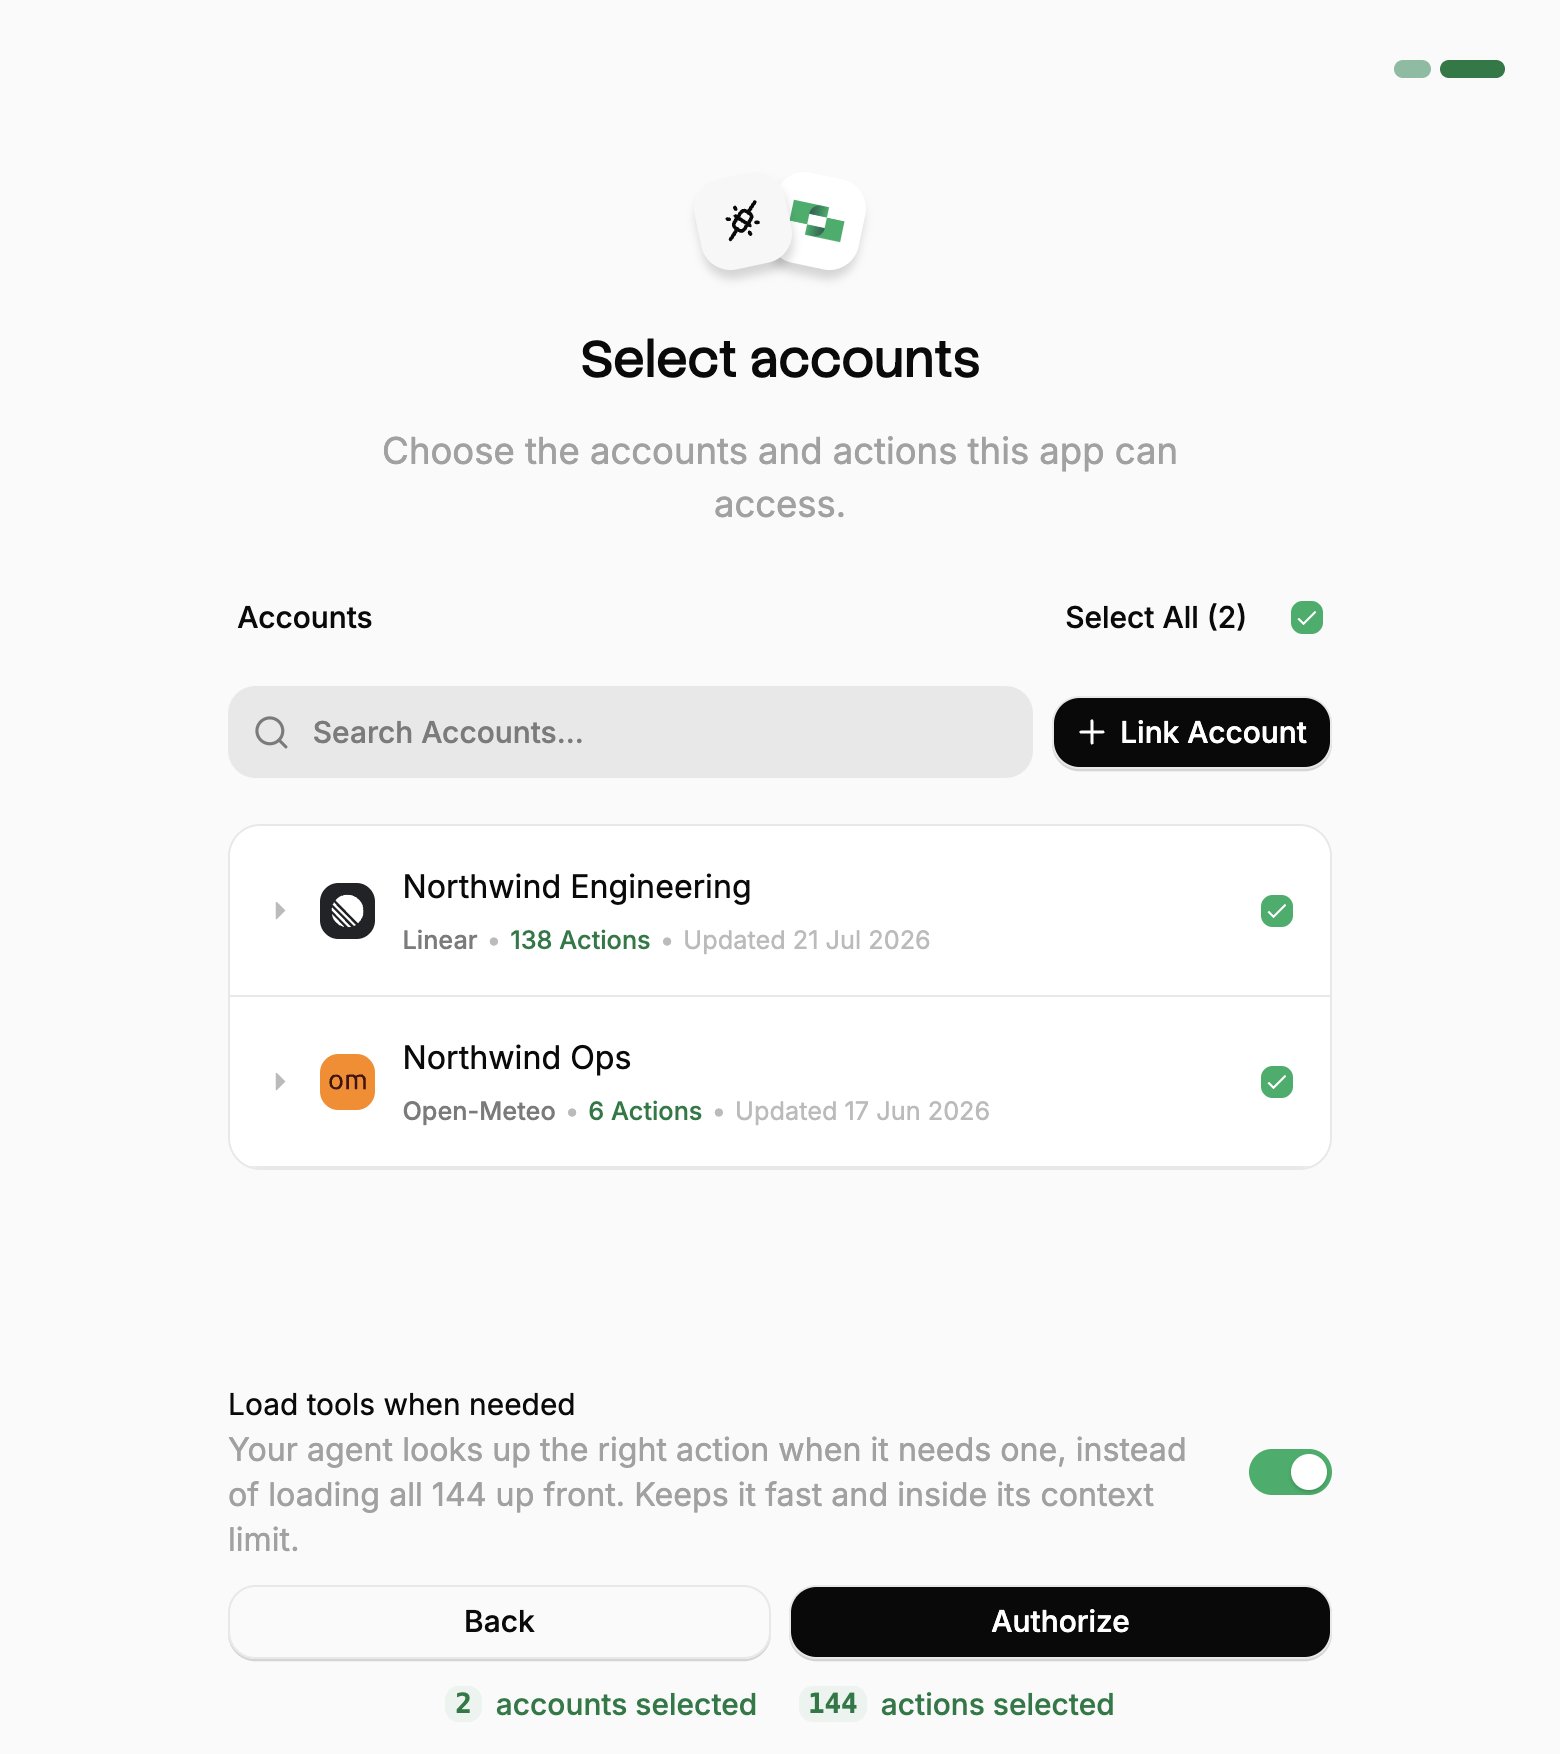
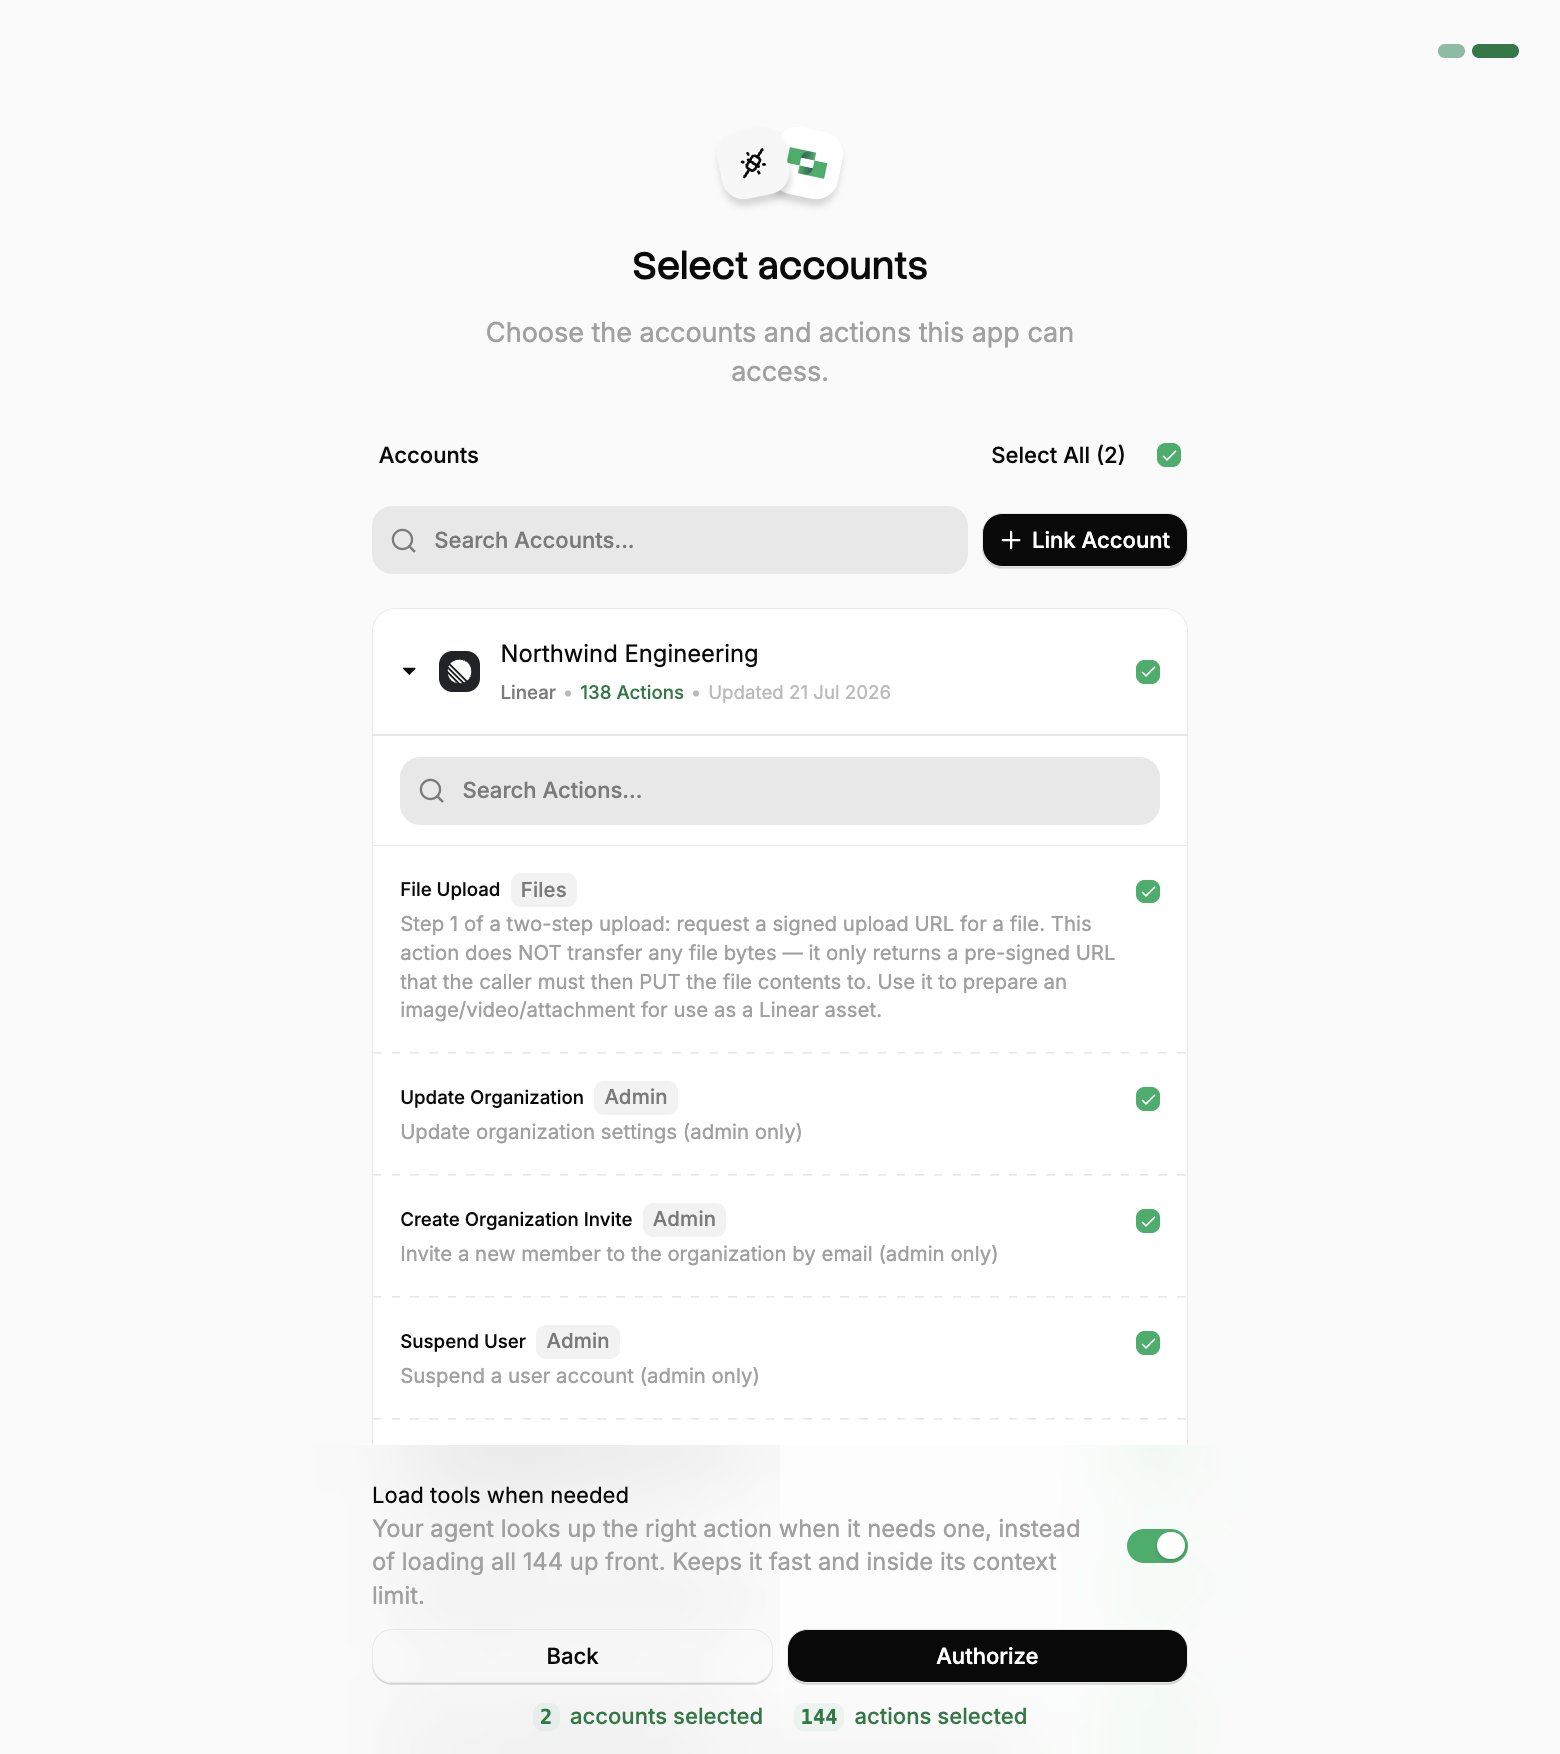
3. **Select accounts and actions.** Existing linked accounts are shown. New accounts can be linked by clicking **+ Link Account**. You can either select the whole account (all actions will be granted) or refine by toggling individual actions.
4. **(Optional) Load tools when needed.** On by default, and the toggle that puts the connection into [Advanced Tool Search](/optimize/advanced-tool-search). Leave it on for large action sets. Turn it off to hand the agent every selected action up front.
5. **Authorize.** Completes the connection; you can return to your client.
 If you see a sentence where the **Load tools when needed** toggle should be, an admin has already settled it for the whole project. See [project settings](/optimize/advanced-tool-search#setting-it-for-a-whole-project).
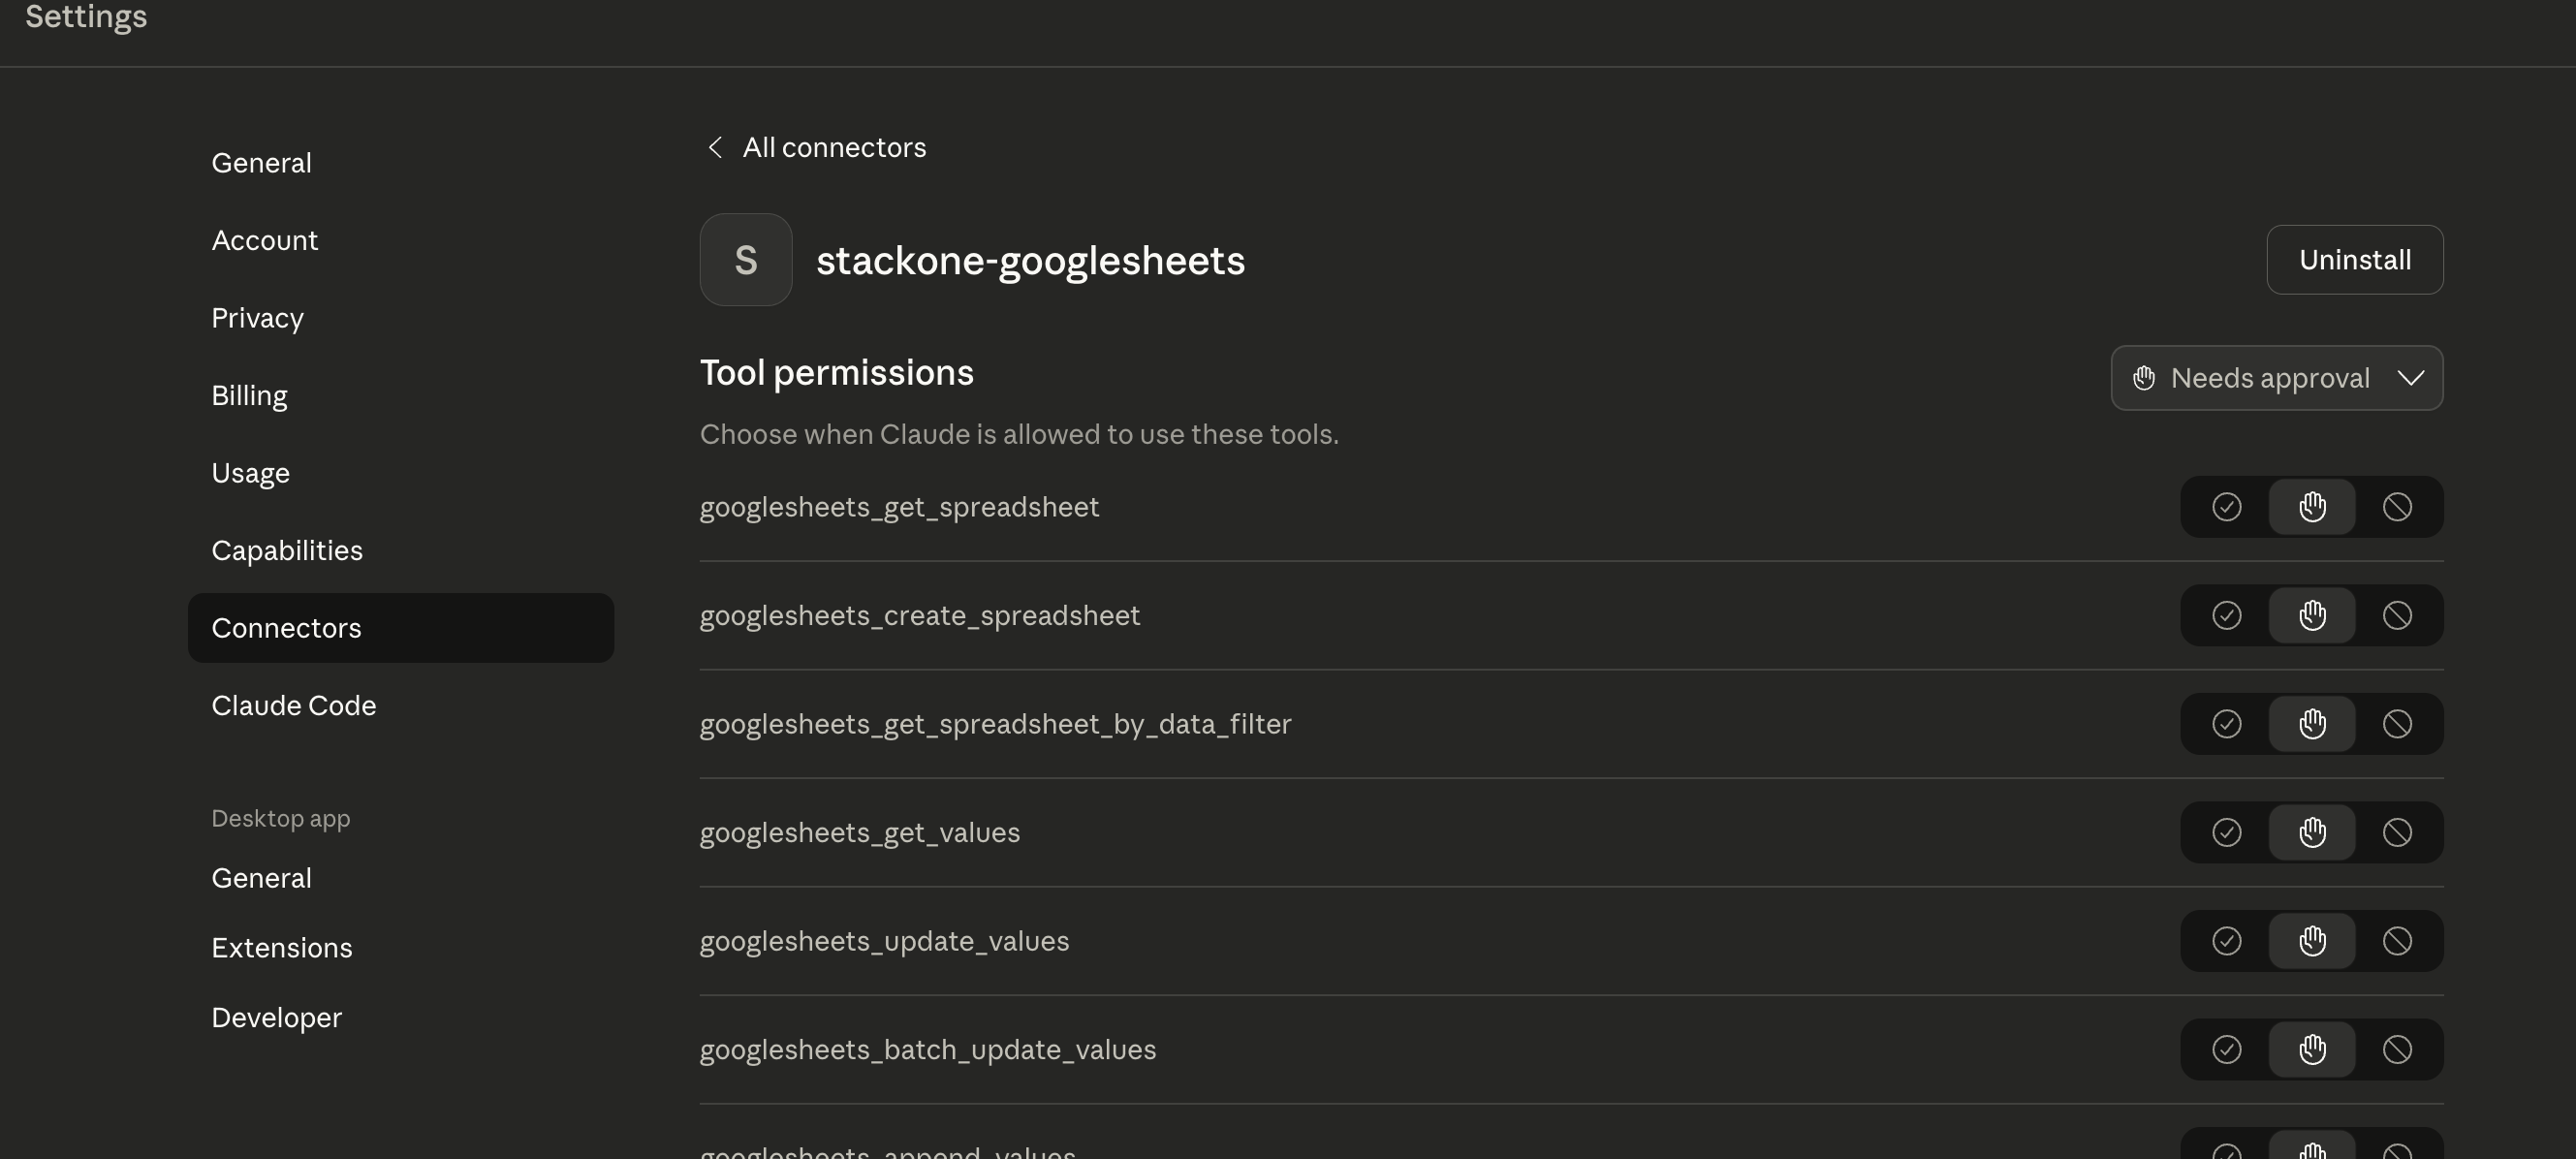
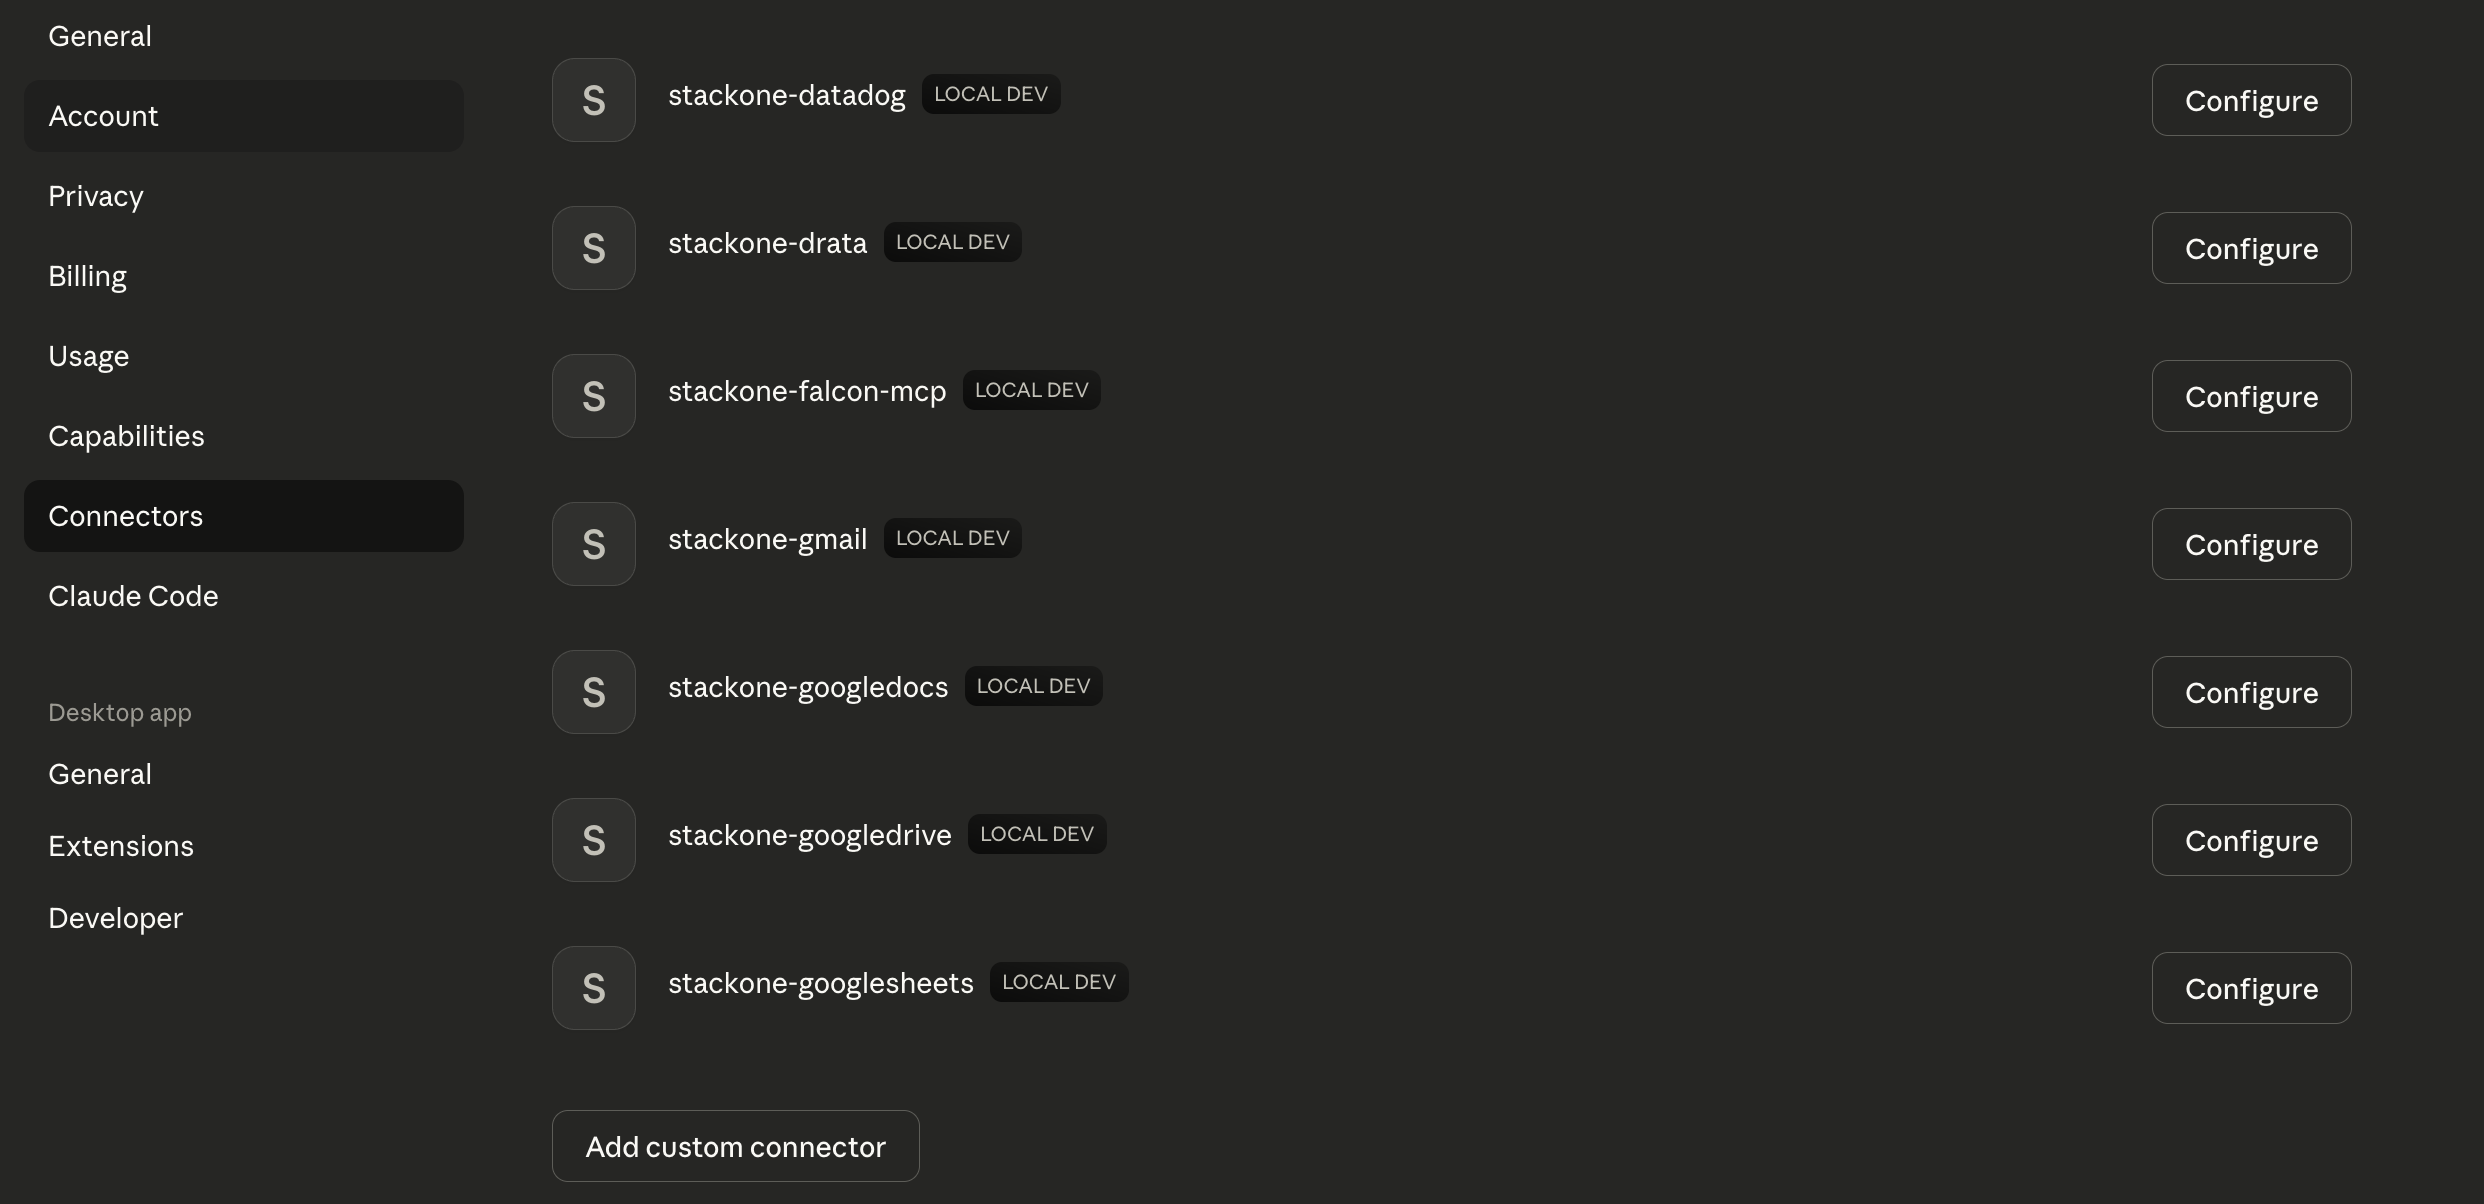
StackOne appears under **Customize → Connectors**, where you can review each tool and set whether it runs automatically or asks first:
If you see a sentence where the **Load tools when needed** toggle should be, an admin has already settled it for the whole project. See [project settings](/optimize/advanced-tool-search#setting-it-for-a-whole-project).
StackOne appears under **Customize → Connectors**, where you can review each tool and set whether it runs automatically or asks first:
 Then try prompts like:
```text theme={null}
What StackOne tools are available?
```
```text theme={null}
Search recent calls in Gong
```
One grant covers every account you approved, so a single connector is usually all you need. To change which accounts or actions it can reach, disconnect the current connector and then run the flow again; to revoke it, use **Connected Apps** in the StackOne dashboard.
A session token URL carries its own credential, so it covers the cases OAuth can't: a shared server, a scheduled job, or anywhere nobody is present to approve a consent screen.
Generate one from **Connectors**, open a connector, then **Use in Agent**. Pick a linked account, set the expiry (one year by default), and copy the URL:
```
https://api.stackone.com/mcp?token={session_token}
```
One URL covers one linked account, and anyone holding it has that access until it expires, so treat it like a password. See [Choosing a connection method](/connect/ai-platforms/overview#choosing-a-connection-method) for the comparison with OAuth.
There is no consent screen to set [Advanced Tool Search](/optimize/advanced-tool-search) on, so add the `tool-mode` query parameter instead:
```
https://api.stackone.com/mcp?token={session_token}&tool-mode=search_execute
```
A token URL is not a remote OAuth connector, so it goes through the [`mcp-remote`](https://github.com/geelen/mcp-remote) package in `claude_desktop_config.json`. Open it from **Settings → Developer → Edit Config**:
* **macOS**: `~/Library/Application Support/Claude/claude_desktop_config.json`
* **Windows**: `%APPDATA%\Claude\claude_desktop_config.json`
```json theme={null}
{
"mcpServers": {
"gsheets": {
"command": "npx",
"args": [
"-y",
"mcp-remote@latest",
"https://api.stackone.com/mcp?token={session_token}"
]
}
}
}
```
Restart Claude Desktop to load it. Servers added this way show under **Settings → Developer** with a green "running" badge; if you see "failed", click **Open Logs Folder**.
For multiple linked accounts, add an entry for each. Get each token from the dashboard by selecting the relevant account.
Then try prompts like:
```text theme={null}
What StackOne tools are available?
```
```text theme={null}
Search recent calls in Gong
```
One grant covers every account you approved, so a single connector is usually all you need. To change which accounts or actions it can reach, disconnect the current connector and then run the flow again; to revoke it, use **Connected Apps** in the StackOne dashboard.
A session token URL carries its own credential, so it covers the cases OAuth can't: a shared server, a scheduled job, or anywhere nobody is present to approve a consent screen.
Generate one from **Connectors**, open a connector, then **Use in Agent**. Pick a linked account, set the expiry (one year by default), and copy the URL:
```
https://api.stackone.com/mcp?token={session_token}
```
One URL covers one linked account, and anyone holding it has that access until it expires, so treat it like a password. See [Choosing a connection method](/connect/ai-platforms/overview#choosing-a-connection-method) for the comparison with OAuth.
There is no consent screen to set [Advanced Tool Search](/optimize/advanced-tool-search) on, so add the `tool-mode` query parameter instead:
```
https://api.stackone.com/mcp?token={session_token}&tool-mode=search_execute
```
A token URL is not a remote OAuth connector, so it goes through the [`mcp-remote`](https://github.com/geelen/mcp-remote) package in `claude_desktop_config.json`. Open it from **Settings → Developer → Edit Config**:
* **macOS**: `~/Library/Application Support/Claude/claude_desktop_config.json`
* **Windows**: `%APPDATA%\Claude\claude_desktop_config.json`
```json theme={null}
{
"mcpServers": {
"gsheets": {
"command": "npx",
"args": [
"-y",
"mcp-remote@latest",
"https://api.stackone.com/mcp?token={session_token}"
]
}
}
}
```
Restart Claude Desktop to load it. Servers added this way show under **Settings → Developer** with a green "running" badge; if you see "failed", click **Open Logs Folder**.
For multiple linked accounts, add an entry for each. Get each token from the dashboard by selecting the relevant account.
 ```json theme={null}
{
"mcpServers": {
"gsheets": {
"command": "npx",
"args": [
"-y",
"mcp-remote@latest",
"https://api.stackone.com/mcp?token={google_sheets_session_token}"
]
},
"slack": {
"command": "npx",
"args": [
"-y",
"mcp-remote@latest",
"https://api.stackone.com/mcp?token={slack_session_token}"
]
}
}
}
```
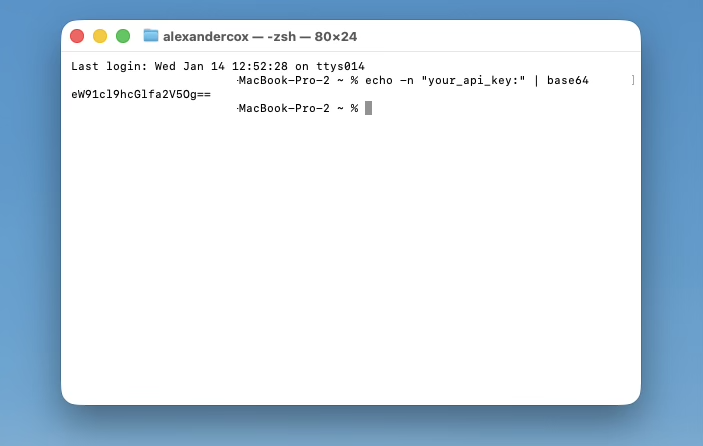
If you prefer to use your API key and account ID directly, encode your API key first:
```bash theme={null}
echo -n "{stackone_api_key}:" | base64
```
```powershell theme={null}
[Convert]::ToBase64String([System.Text.Encoding]::UTF8.GetBytes("{stackone_api_key}:"))
```
```cmd theme={null}
powershell -Command "[Convert]::ToBase64String([System.Text.Encoding]::UTF8.GetBytes(\"{stackone_api_key}:\"))"
```
```json theme={null}
{
"mcpServers": {
"gsheets": {
"command": "npx",
"args": [
"-y",
"mcp-remote@latest",
"https://api.stackone.com/mcp?token={google_sheets_session_token}"
]
},
"slack": {
"command": "npx",
"args": [
"-y",
"mcp-remote@latest",
"https://api.stackone.com/mcp?token={slack_session_token}"
]
}
}
}
```
If you prefer to use your API key and account ID directly, encode your API key first:
```bash theme={null}
echo -n "{stackone_api_key}:" | base64
```
```powershell theme={null}
[Convert]::ToBase64String([System.Text.Encoding]::UTF8.GetBytes("{stackone_api_key}:"))
```
```cmd theme={null}
powershell -Command "[Convert]::ToBase64String([System.Text.Encoding]::UTF8.GetBytes(\"{stackone_api_key}:\"))"
```
 Then add to your config:
```json theme={null}
{
"mcpServers": {
"gsheets": {
"command": "npx",
"args": [
"-y",
"mcp-remote@latest",
"https://api.stackone.com/mcp?x-account-id={account_id}",
"--header",
"Authorization: Basic {base64_encoded_api_key}"
]
}
}
}
```
## Programmatic integration
For programmatic integration with Anthropic's Claude API, see the [Anthropic SDK Framework Guide](/embed/call-actions/mcp/anthropic-sdk).
## Optimize and secure
With your agent connected, use StackOne's platform features to optimize performance and secure every call.
Reduce context and save tokens.
Search synced records for a fraction of the tokens.
Block prompt injections before they reach your agent.
Then add to your config:
```json theme={null}
{
"mcpServers": {
"gsheets": {
"command": "npx",
"args": [
"-y",
"mcp-remote@latest",
"https://api.stackone.com/mcp?x-account-id={account_id}",
"--header",
"Authorization: Basic {base64_encoded_api_key}"
]
}
}
}
```
## Programmatic integration
For programmatic integration with Anthropic's Claude API, see the [Anthropic SDK Framework Guide](/embed/call-actions/mcp/anthropic-sdk).
## Optimize and secure
With your agent connected, use StackOne's platform features to optimize performance and secure every call.
Reduce context and save tokens.
Search synced records for a fraction of the tokens.
Block prompt injections before they reach your agent.